- Microsoft Entra ID
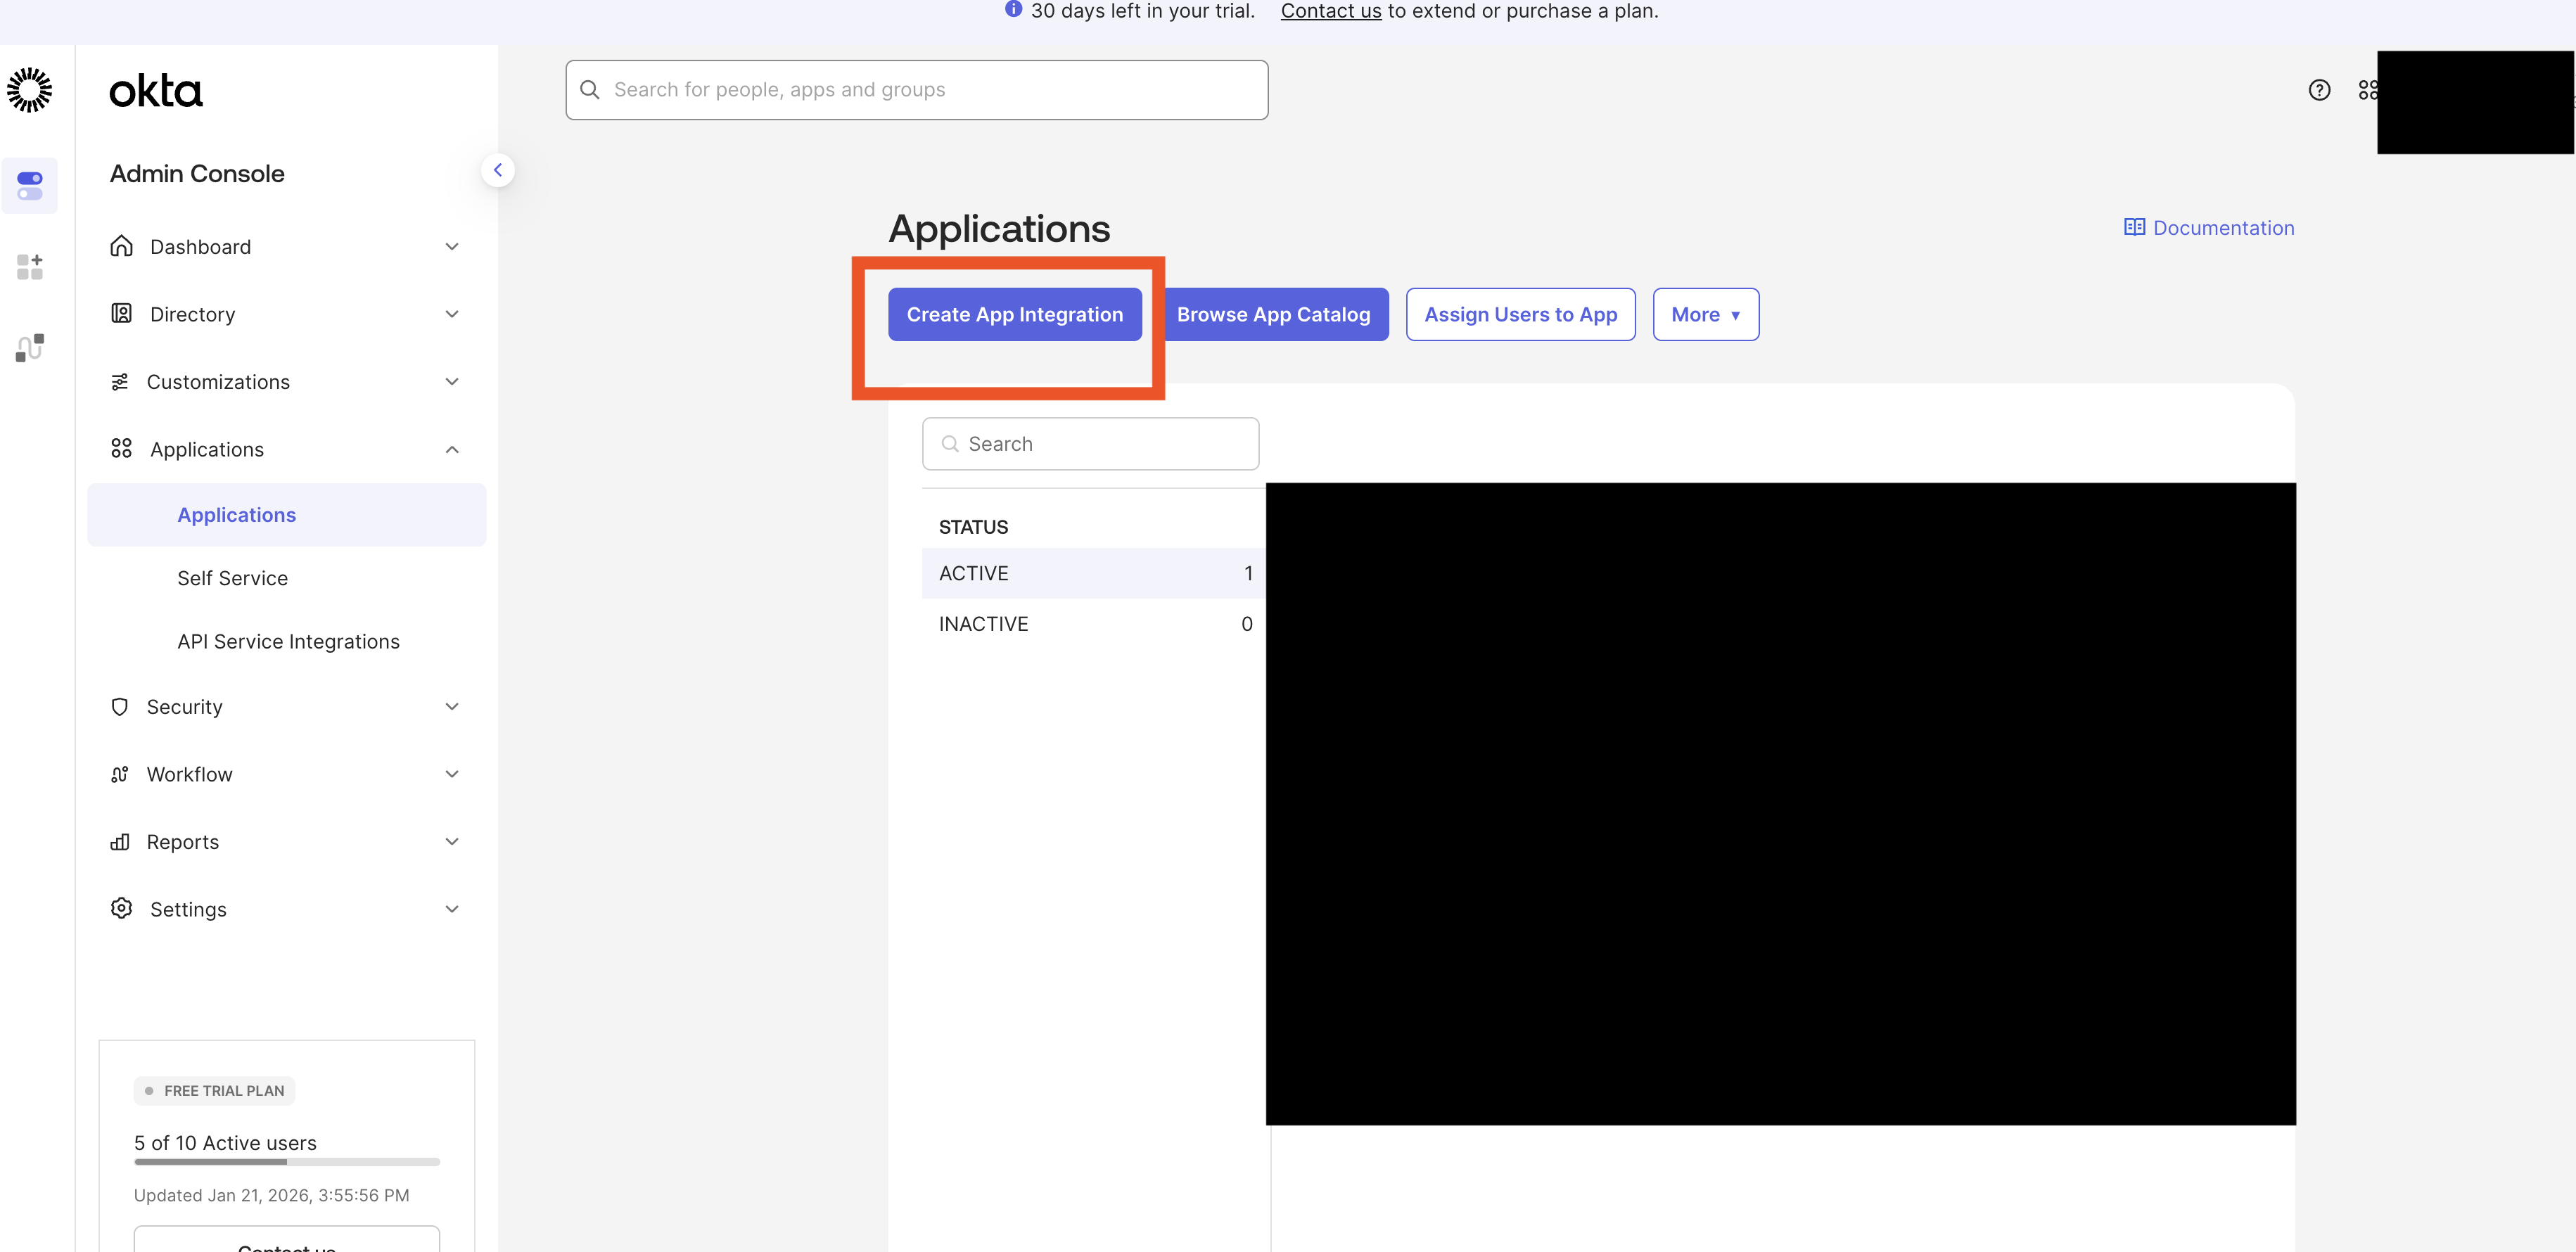
- Okta
Setup SAML with Microsoft Entra ID (Azure AD)
-
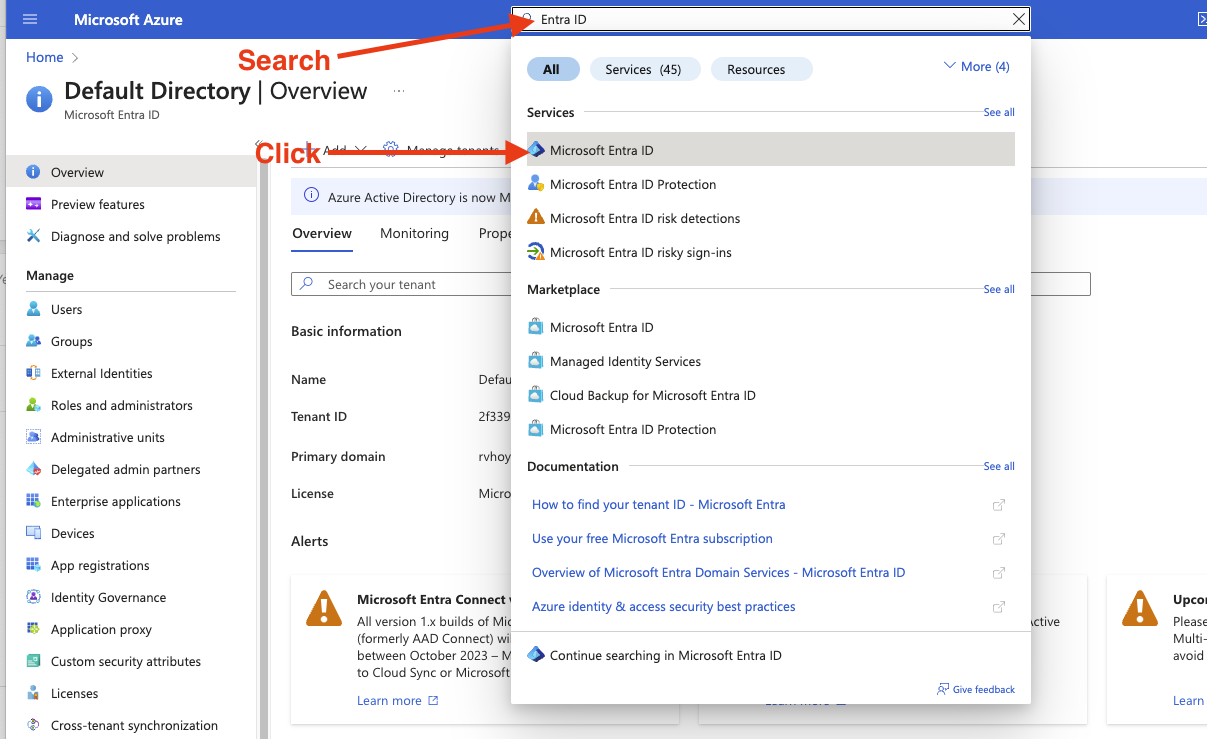
Login to your Microsoft Azure portal and search for “Entra ID” in the search bar and click “Microsoft Entra ID” from the search results.
-
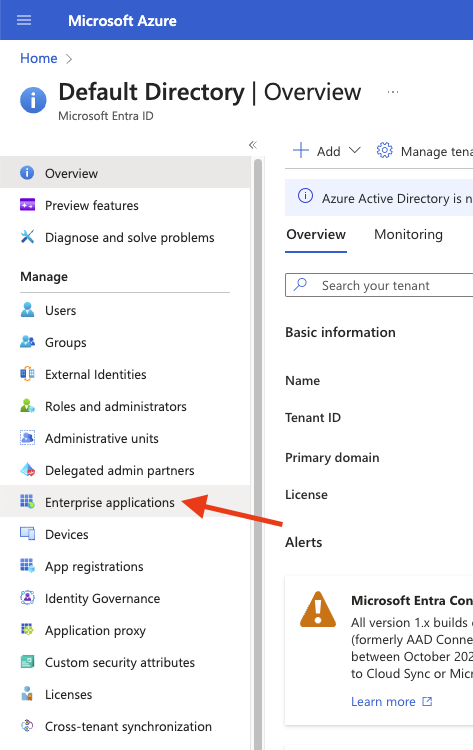
Click on “Enterprise applications” from the left side menu.
-
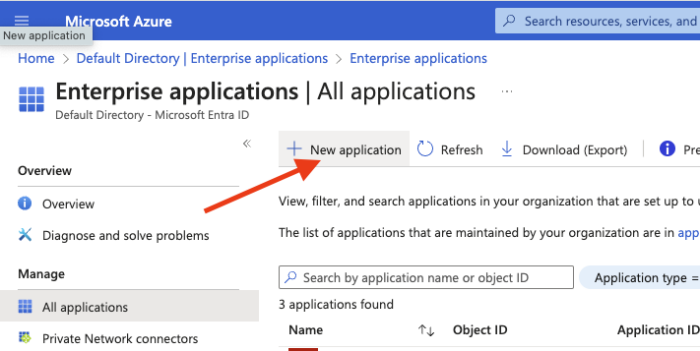
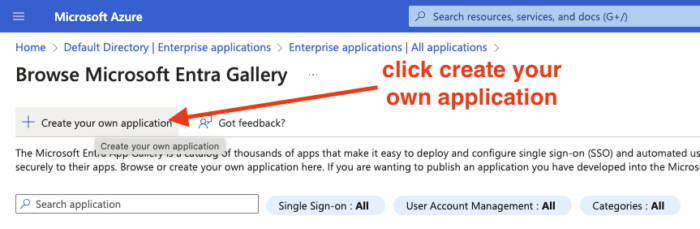
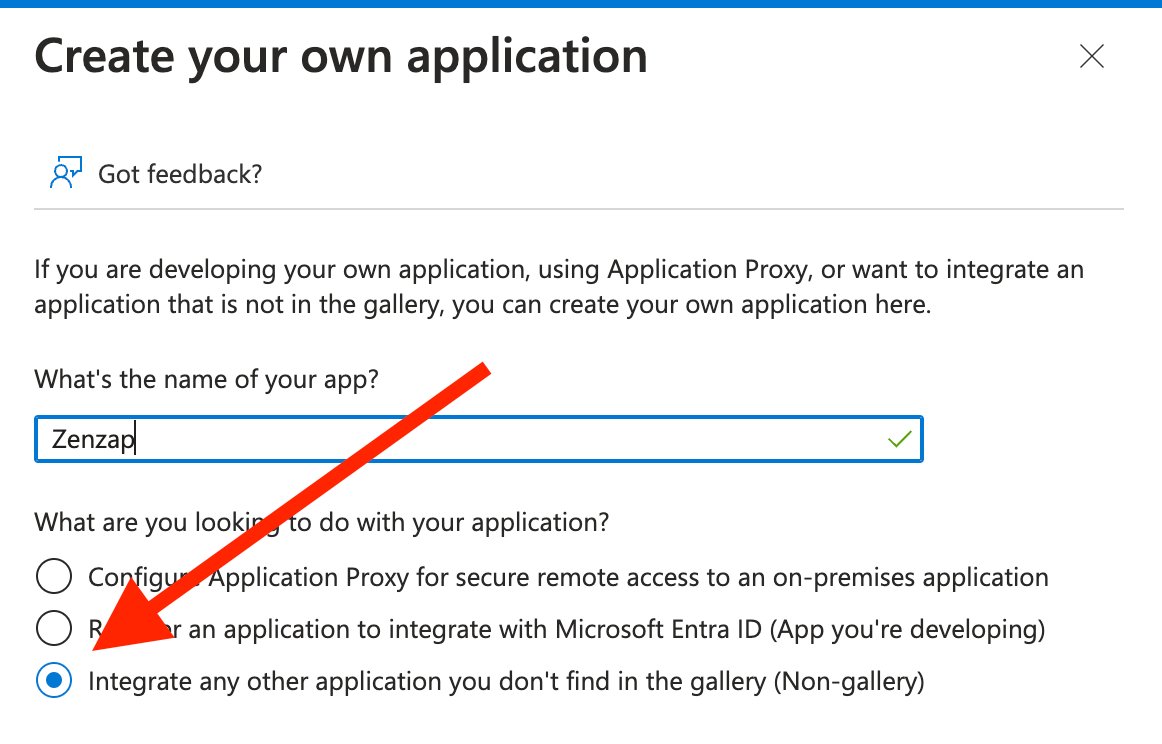
Click “New Application” and select “Create your own application”
-
Enter the name of your application and click “Create”
-
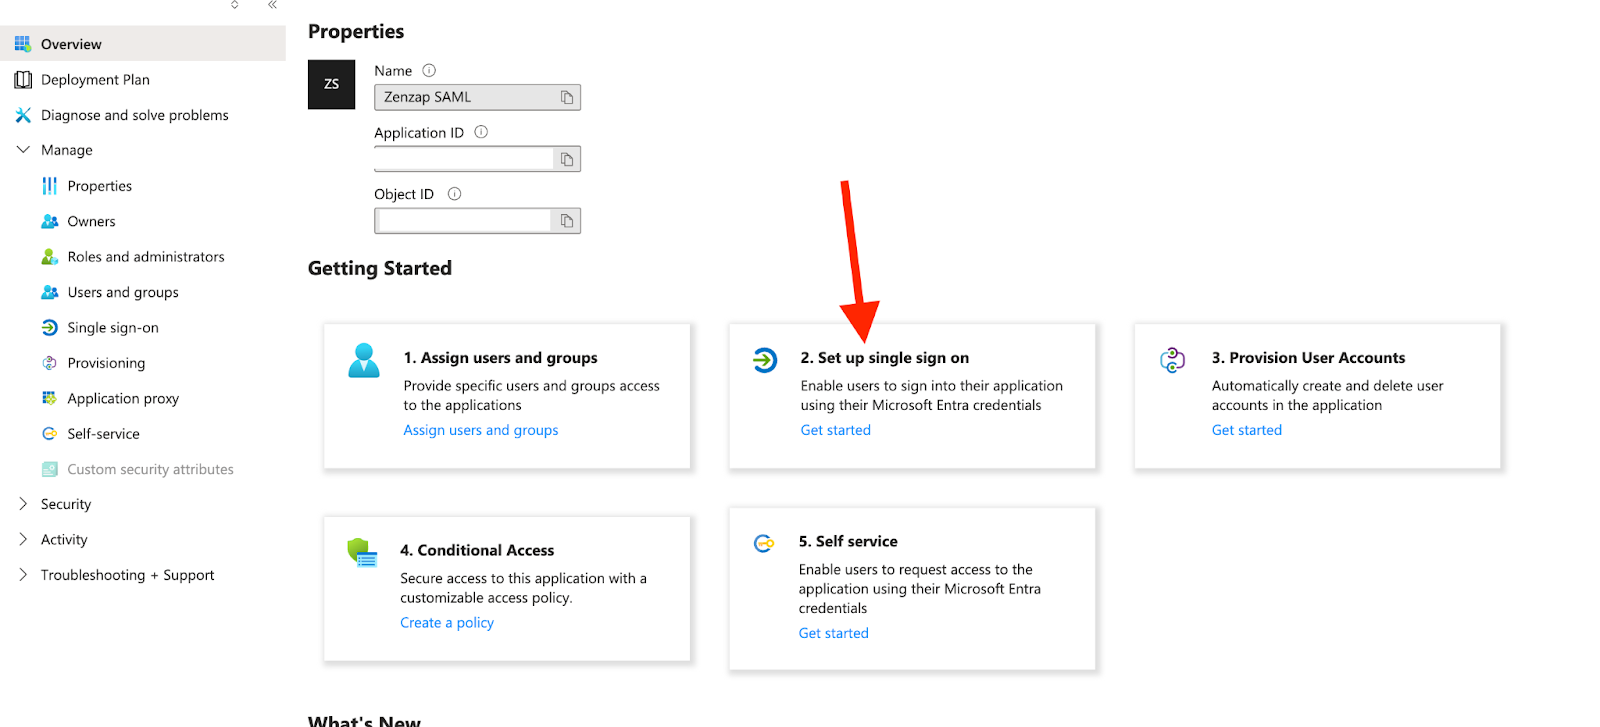
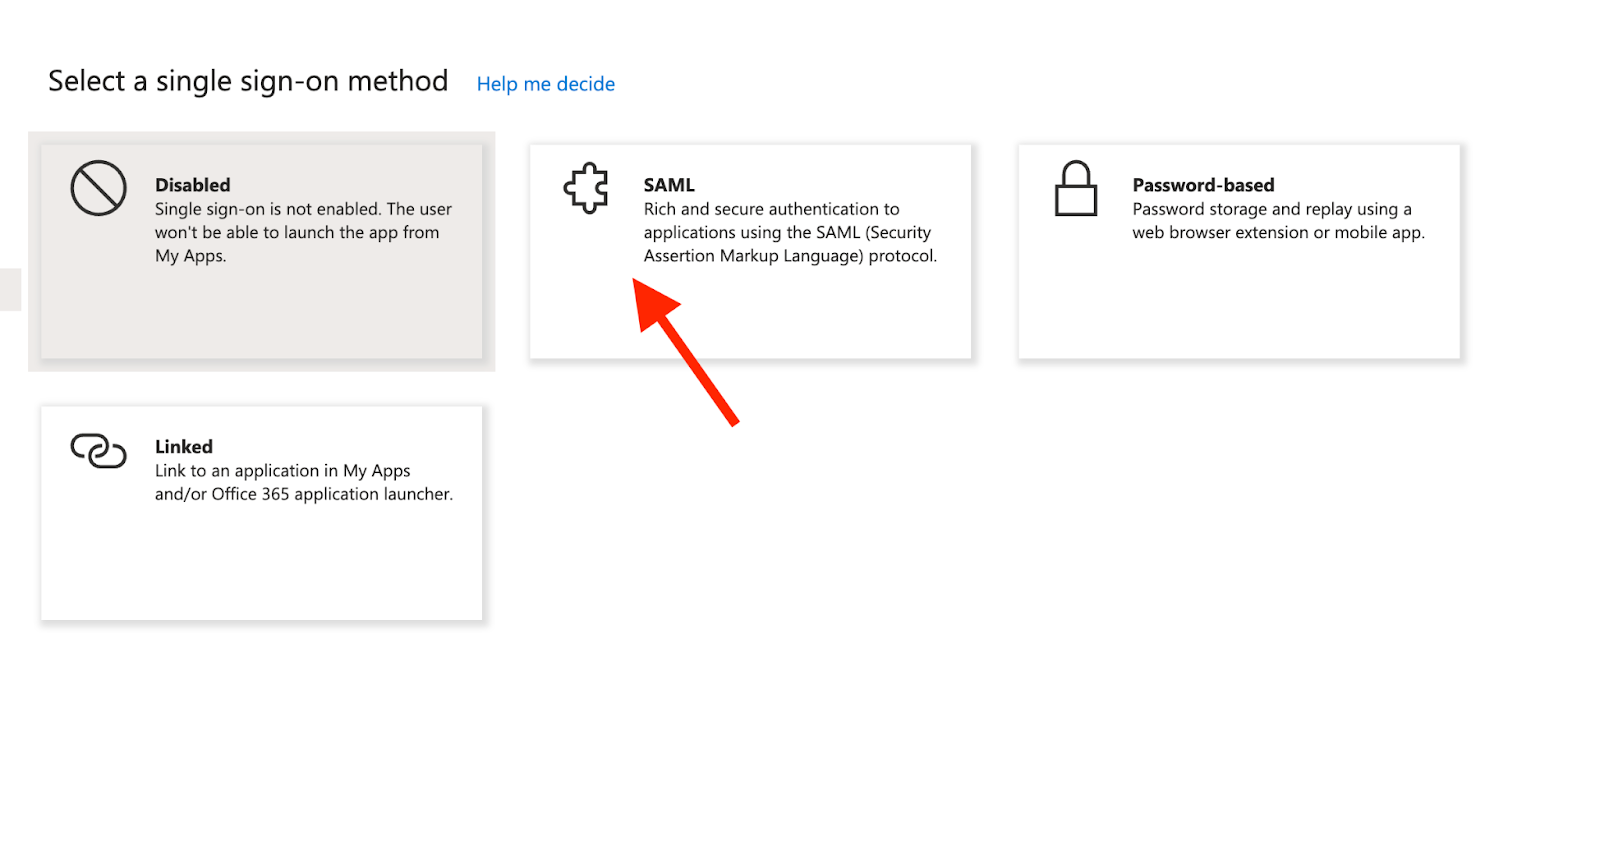
In the new app, click on “Single sign-on” from the left side menu and select “SAML”
-
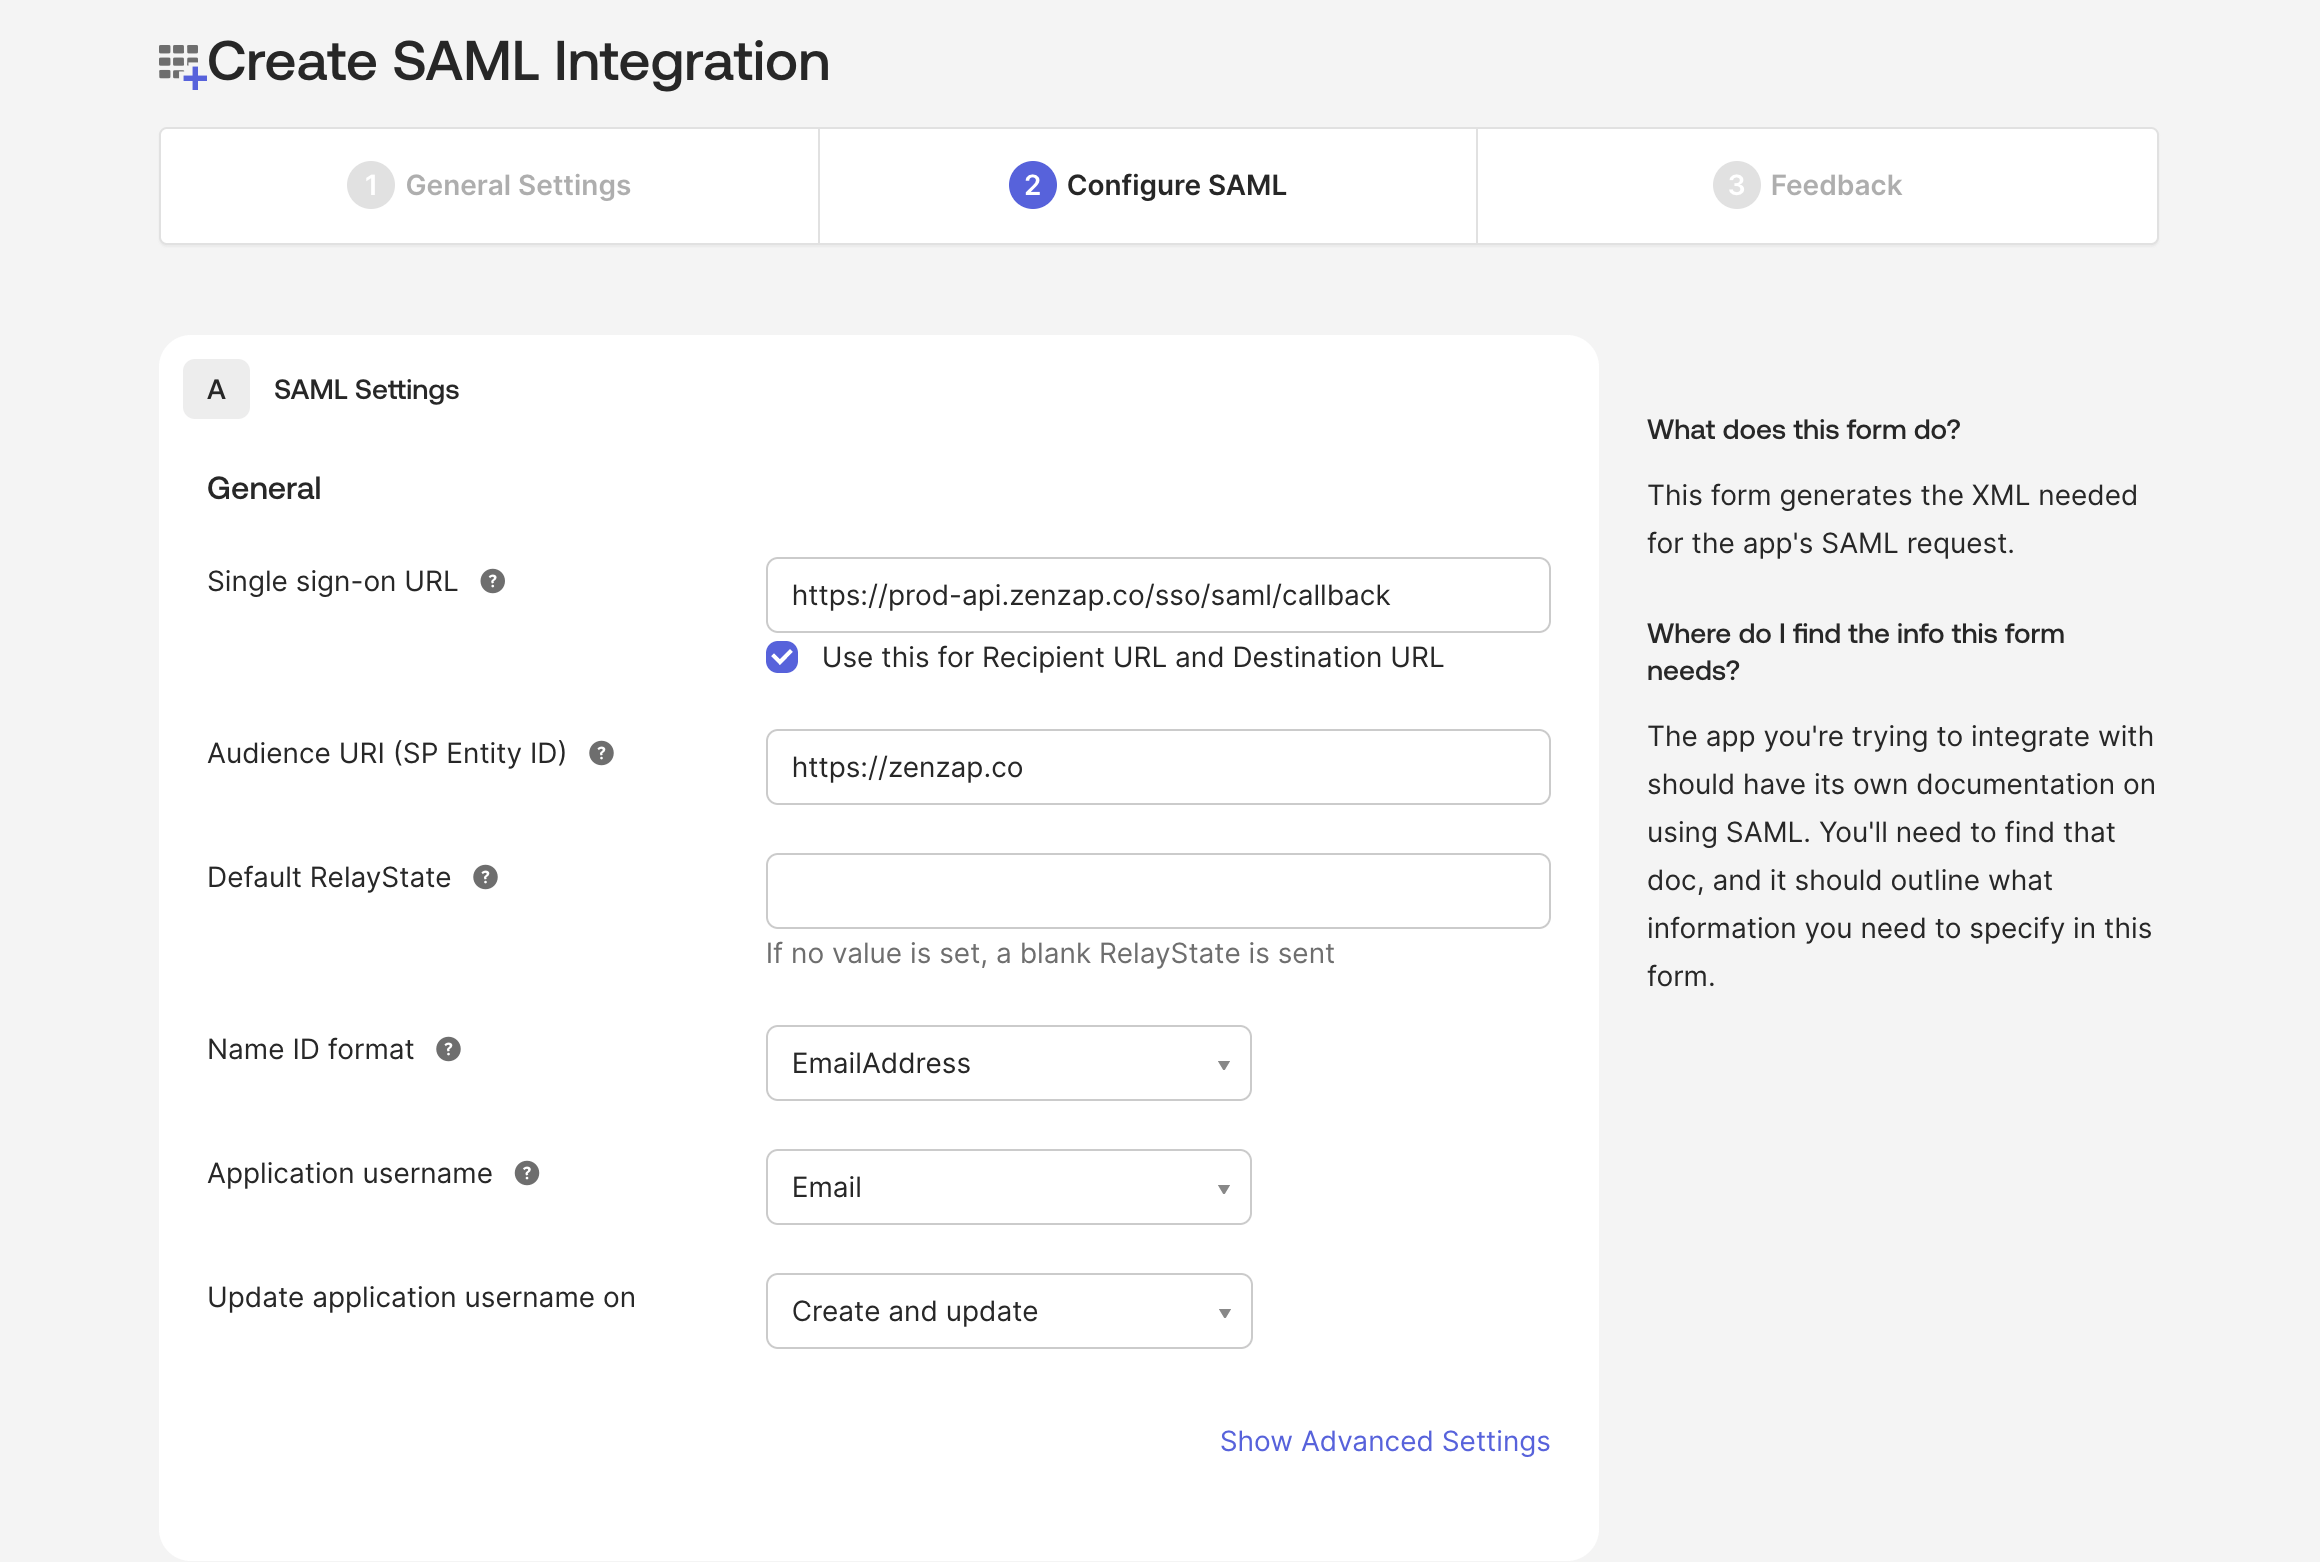
Click on “Edit” and enter the following values:
- Identifier (Entity ID):
https://zenzap.co - Reply URL (Assertion Consumer Service URL):
https://prod-api.zenzap.co/sso/saml/callback\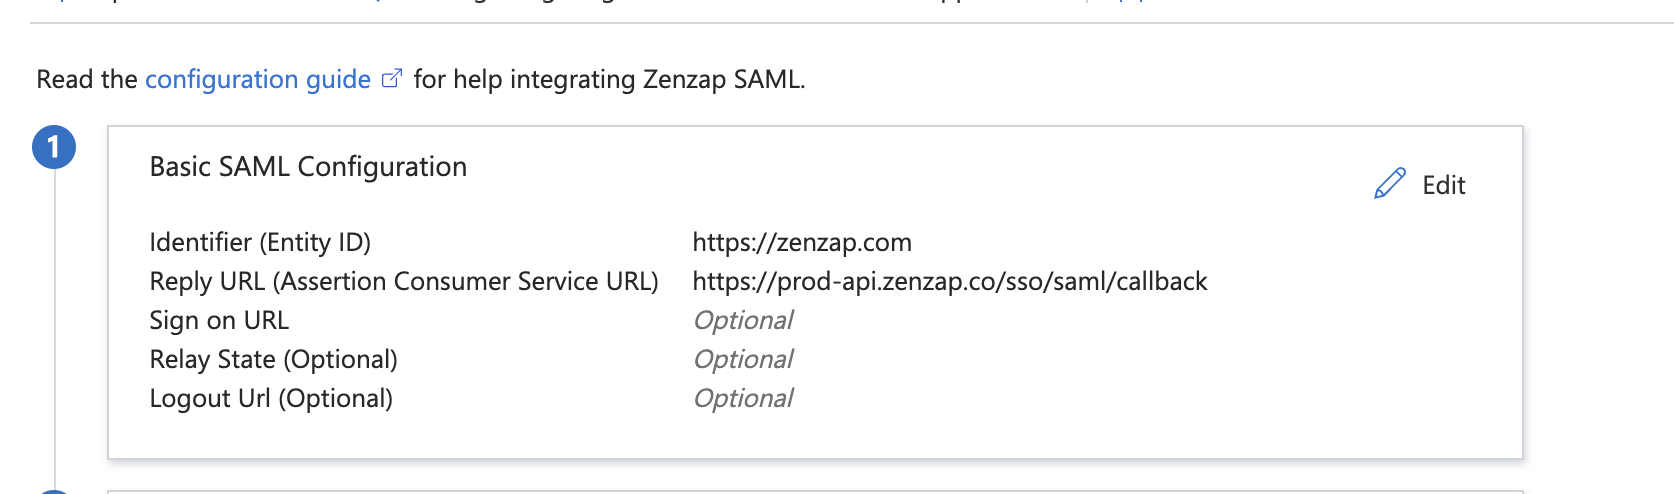
- Identifier (Entity ID):
- Click “Save”
-
Click on “User Attributes & Claims” from the left side menu and click “Add new claim”
displayName- recommended to be the user first name + last nameemail- recommended to be the user emailid-user.objectid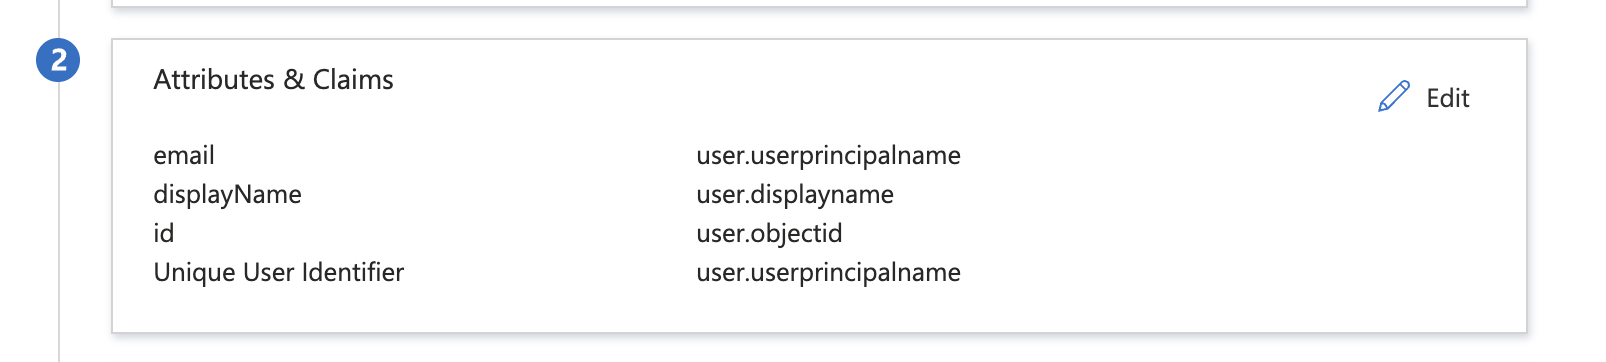
-
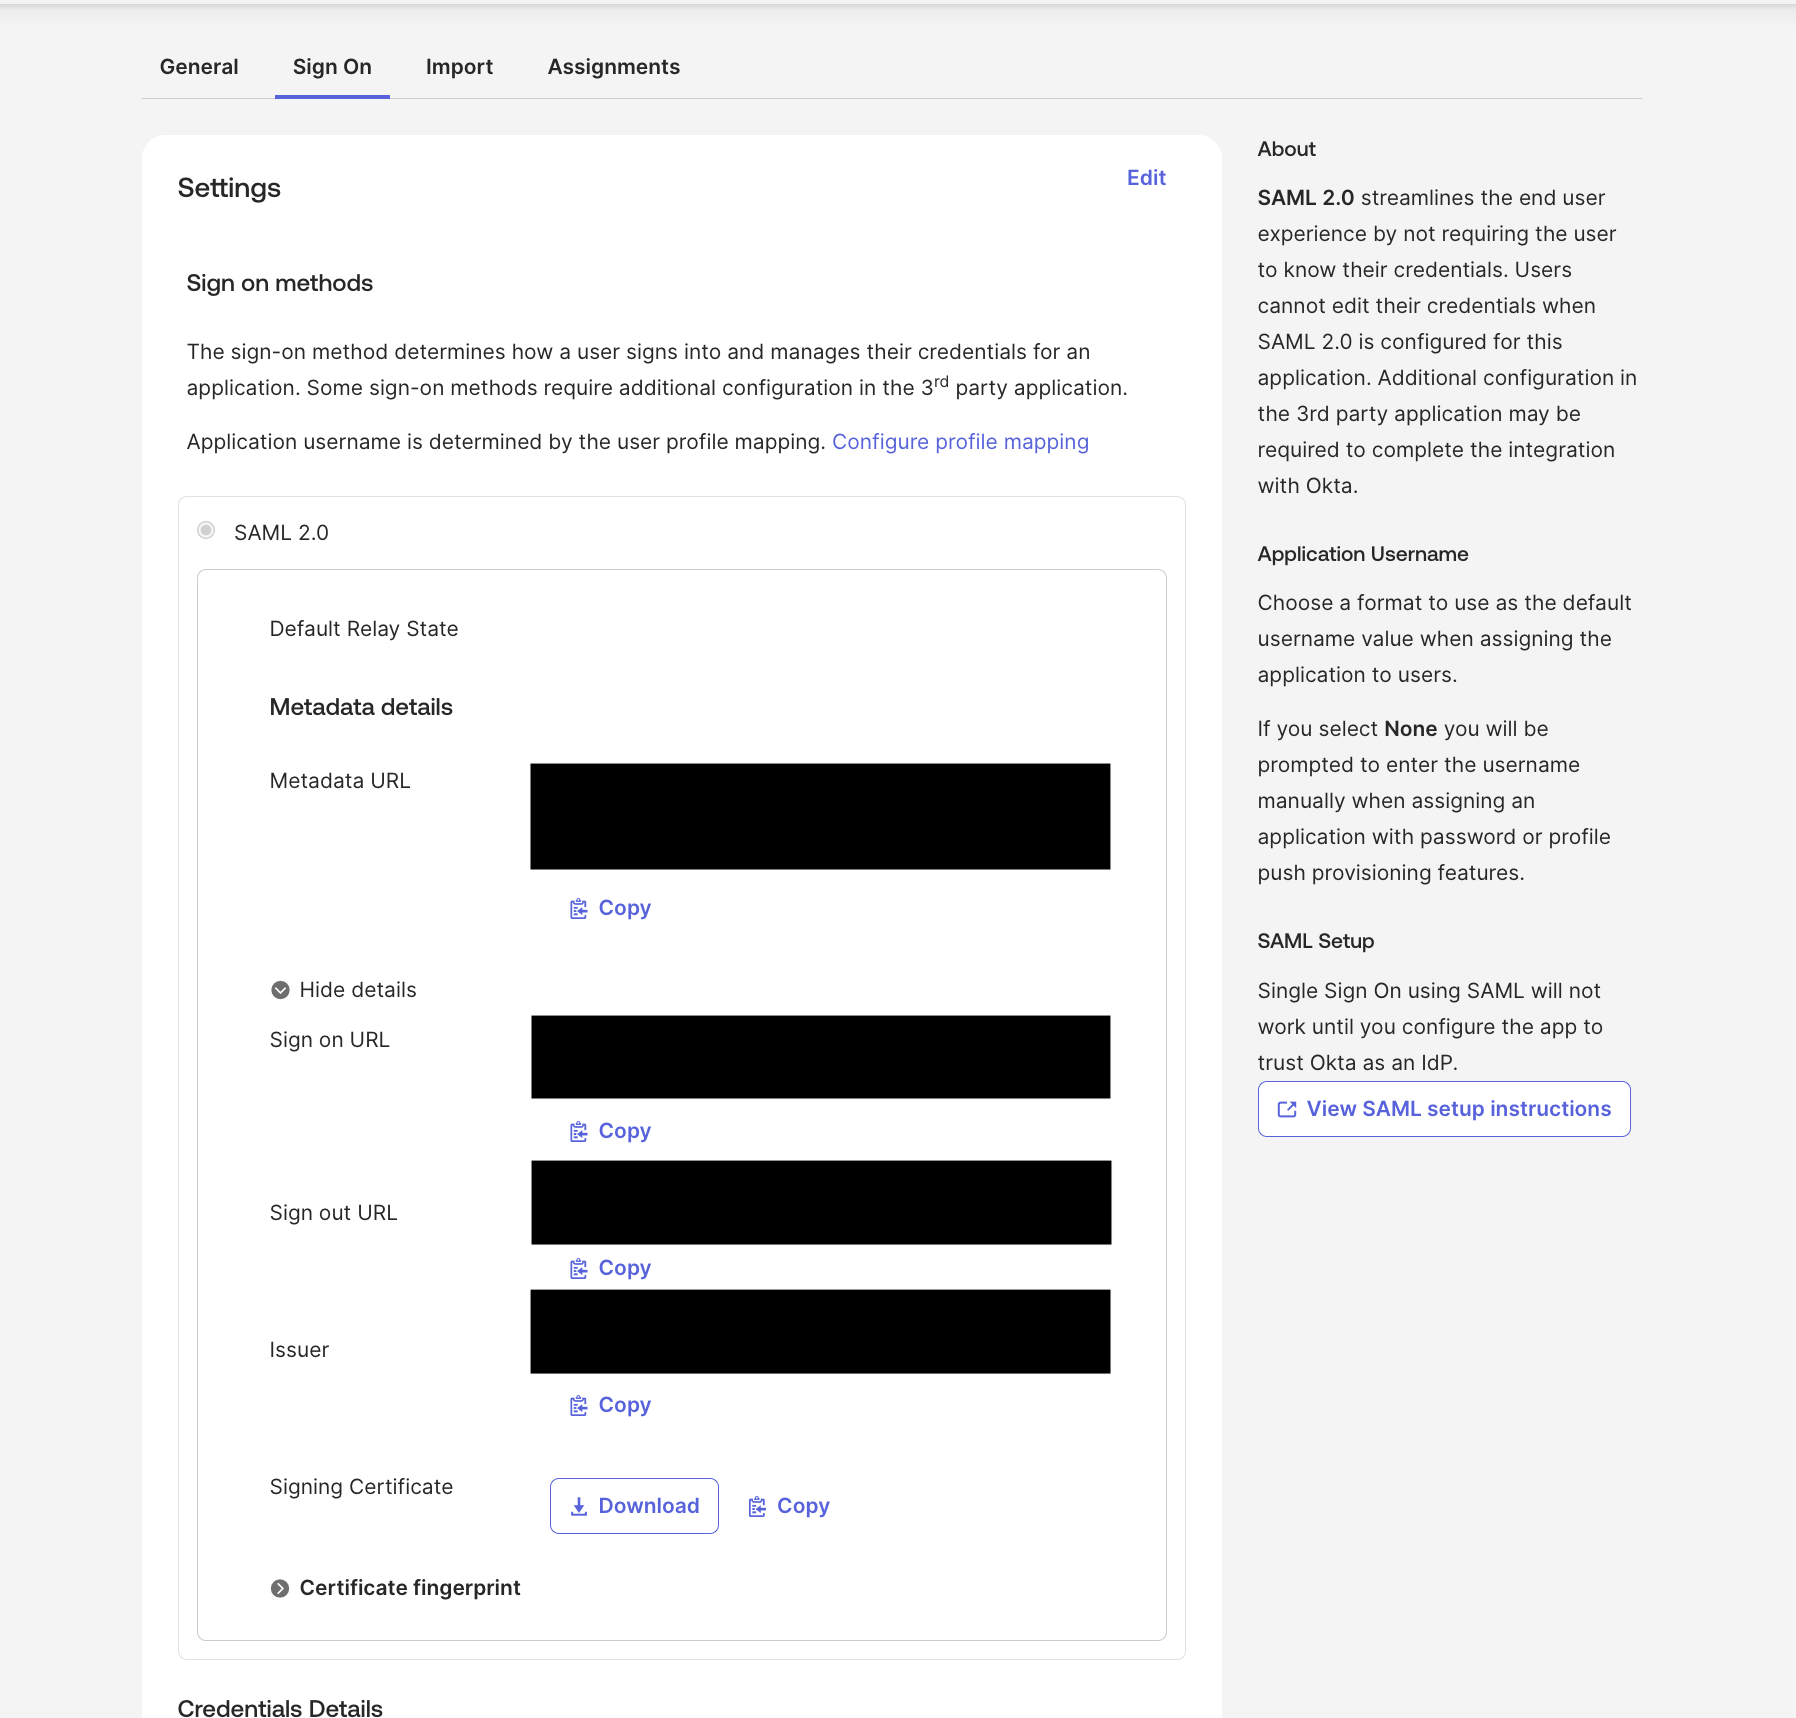
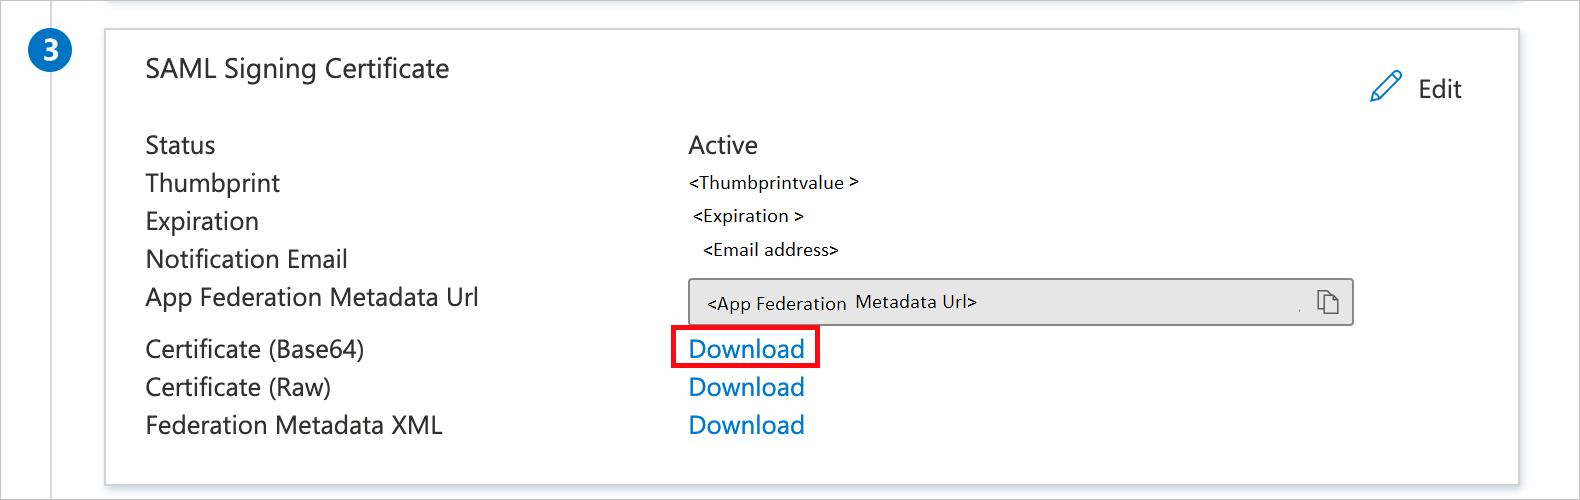
Download the certificate (base64) and save it.
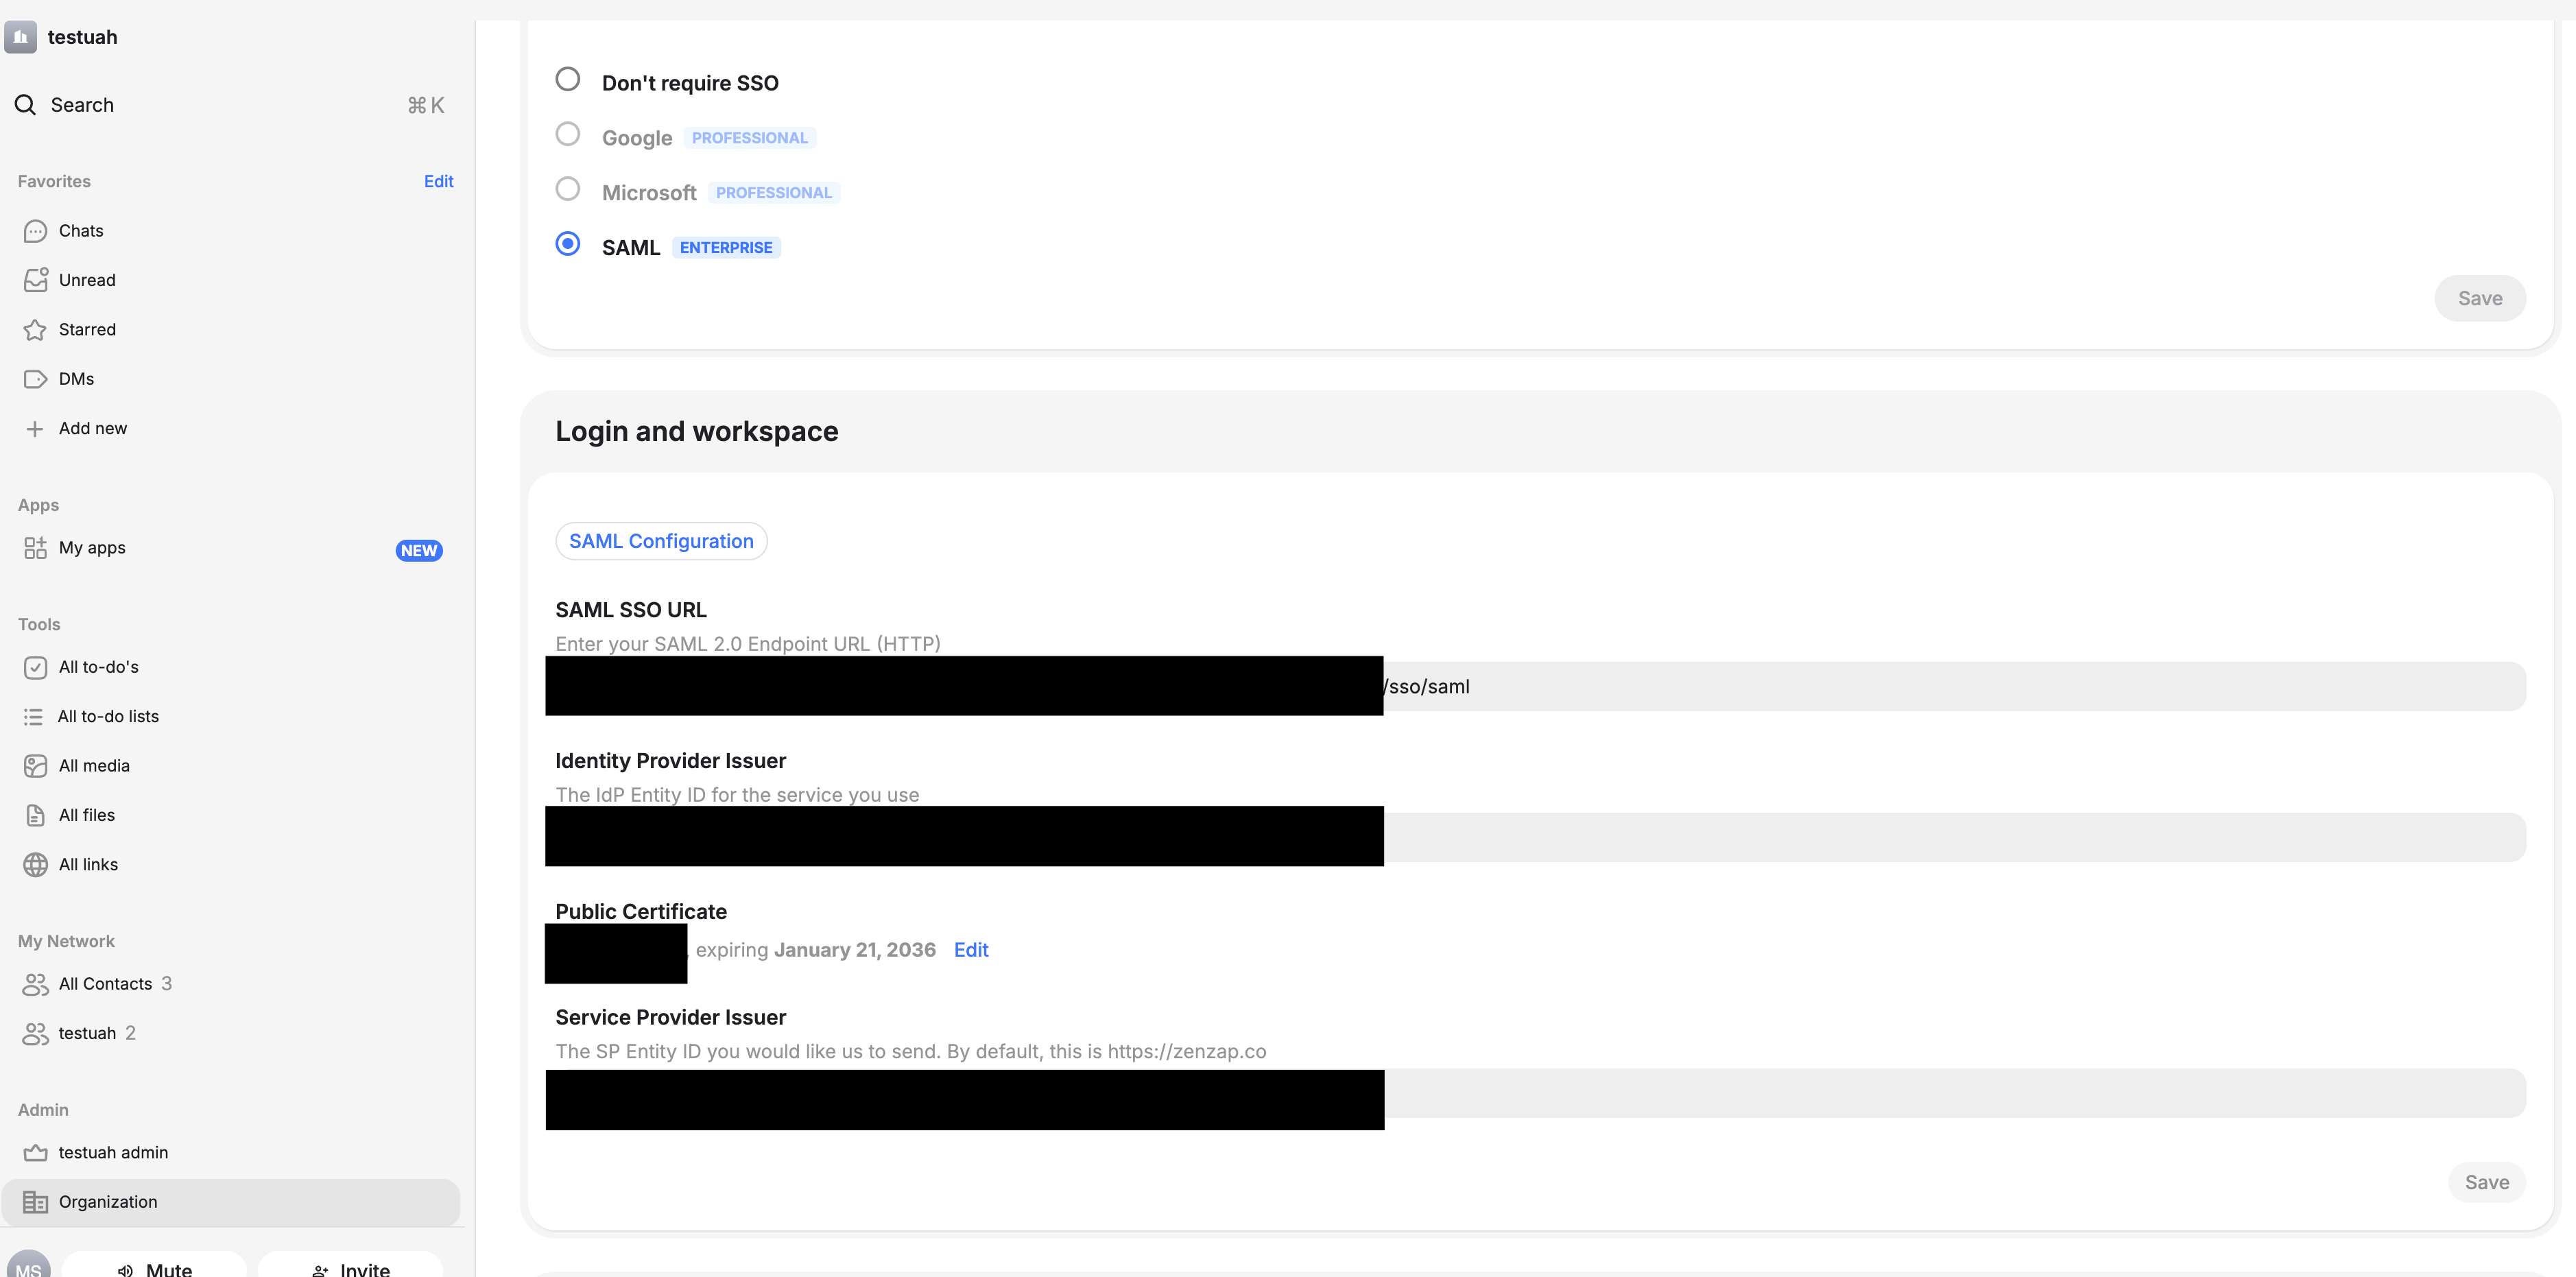
- Configure SAML in Zenzap:
- Go to your Zenzap account and navigate to Admin → Organization
- Under “Single sign on (SSO)”, select SAML
- Enter the following values from your Azure AD SAML configuration page:
- SAML SSO URL: Format
https://login.microsoftonline.com/xxxxxx/saml2 - Identity Provider Issuer: Format
https://sts.windows.net/xxxx
- SAML SSO URL: Format
- Upload the certificate you downloaded in step 9
- Enter Service Provider Entity ID as
https://zenzap.co - Click “Save”
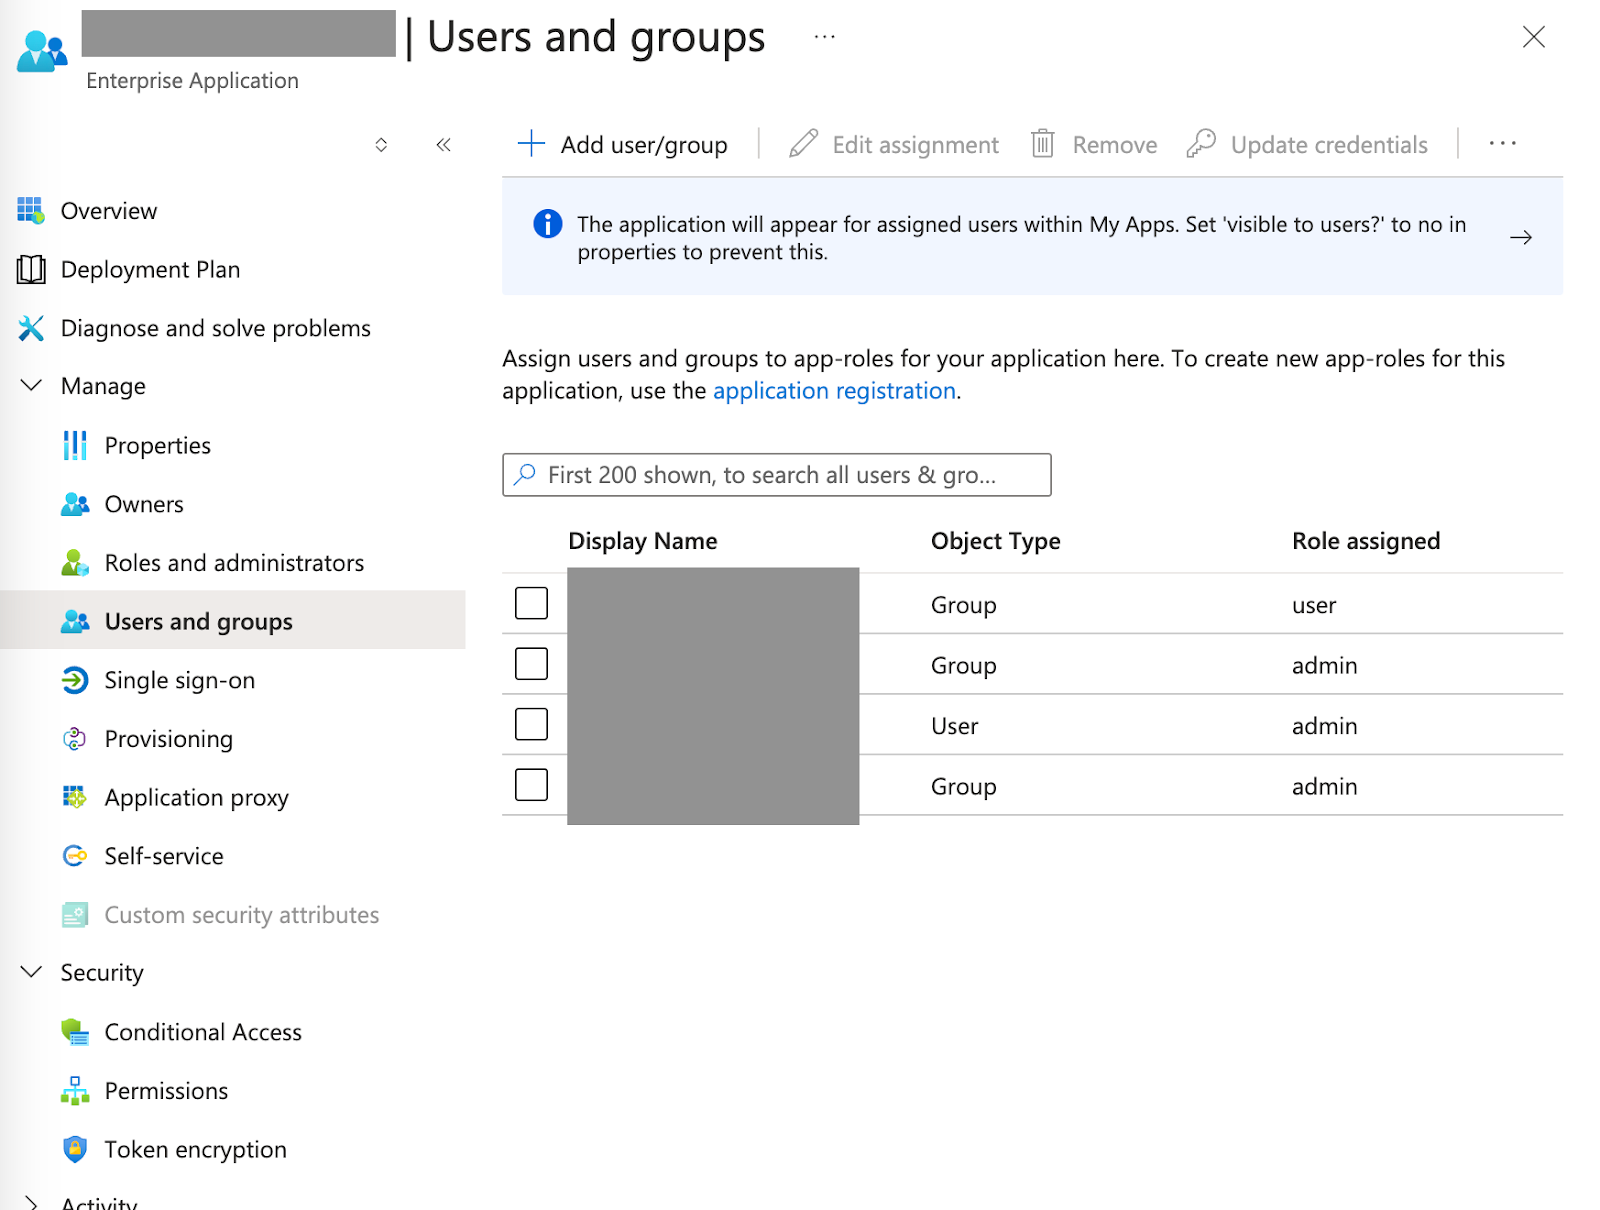
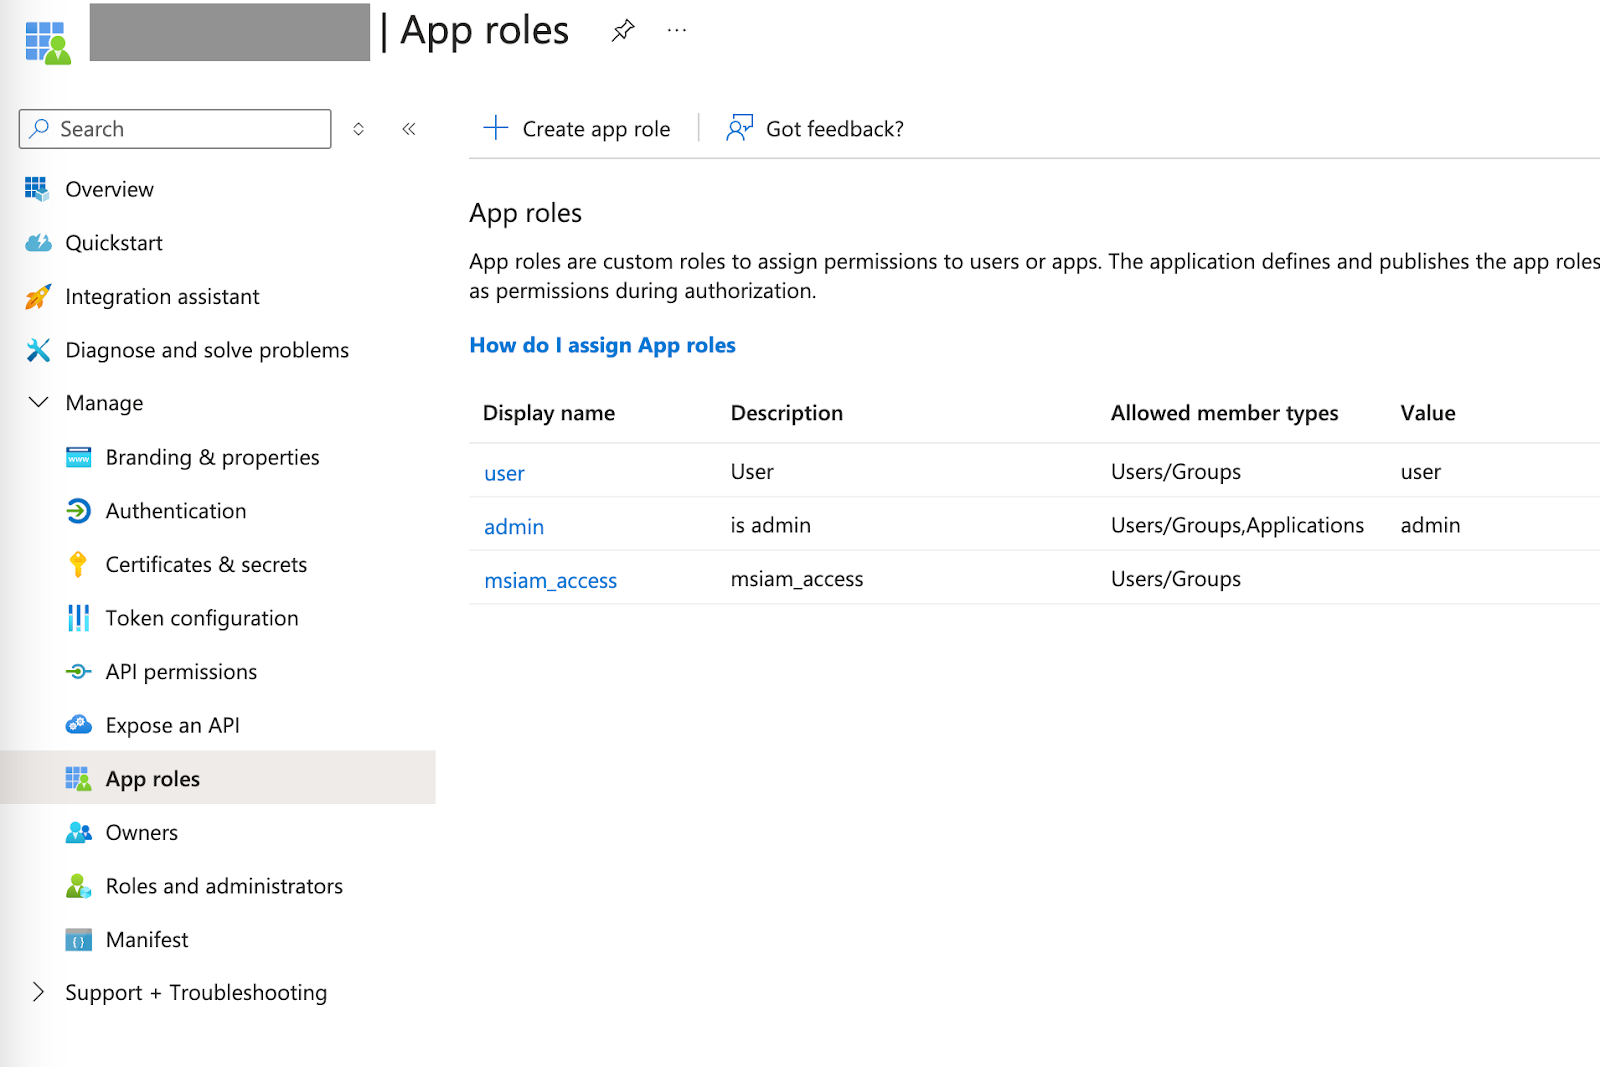
User Groups (App Roles)
Configure user roles to control access levels within Zenzap.-
In Entra ID: Go to app registration → Application Name → App roles
-
Create new app roles. Zenzap supports 2 app role values:
adminanduser
-
Assign the app roles to the users/groups