- Microsoft Entra ID
- Okta
Setup SCIM with Microsoft Entra ID (Azure AD)
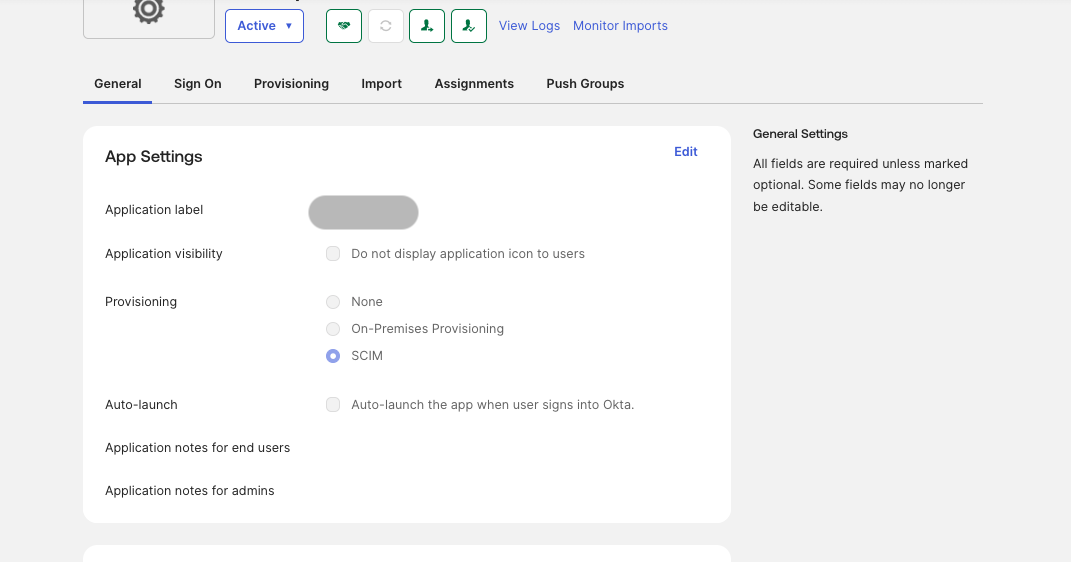
Automate user provisioning and deprovisioning between Entra ID and Zenzap.- In your enterprise app, click Provision User Accounts
-
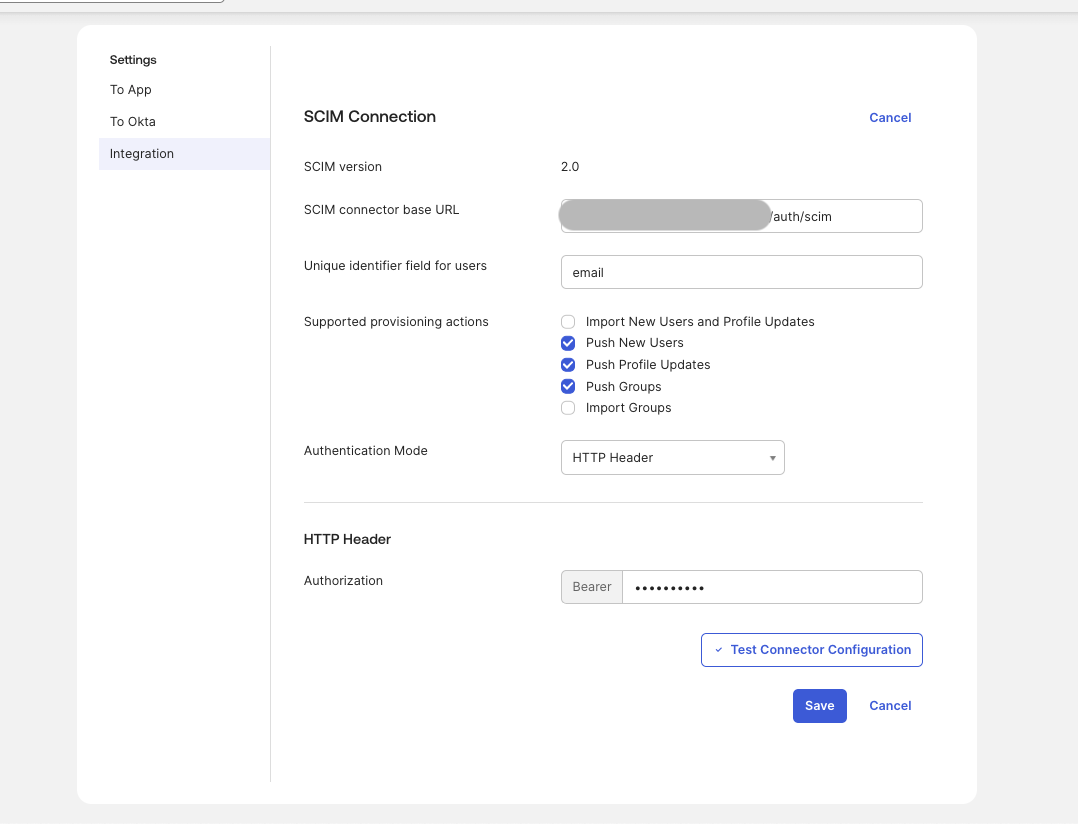
Use the url
https://prod-api.zenzap.co/auth/scimand the key provided by your CS representative.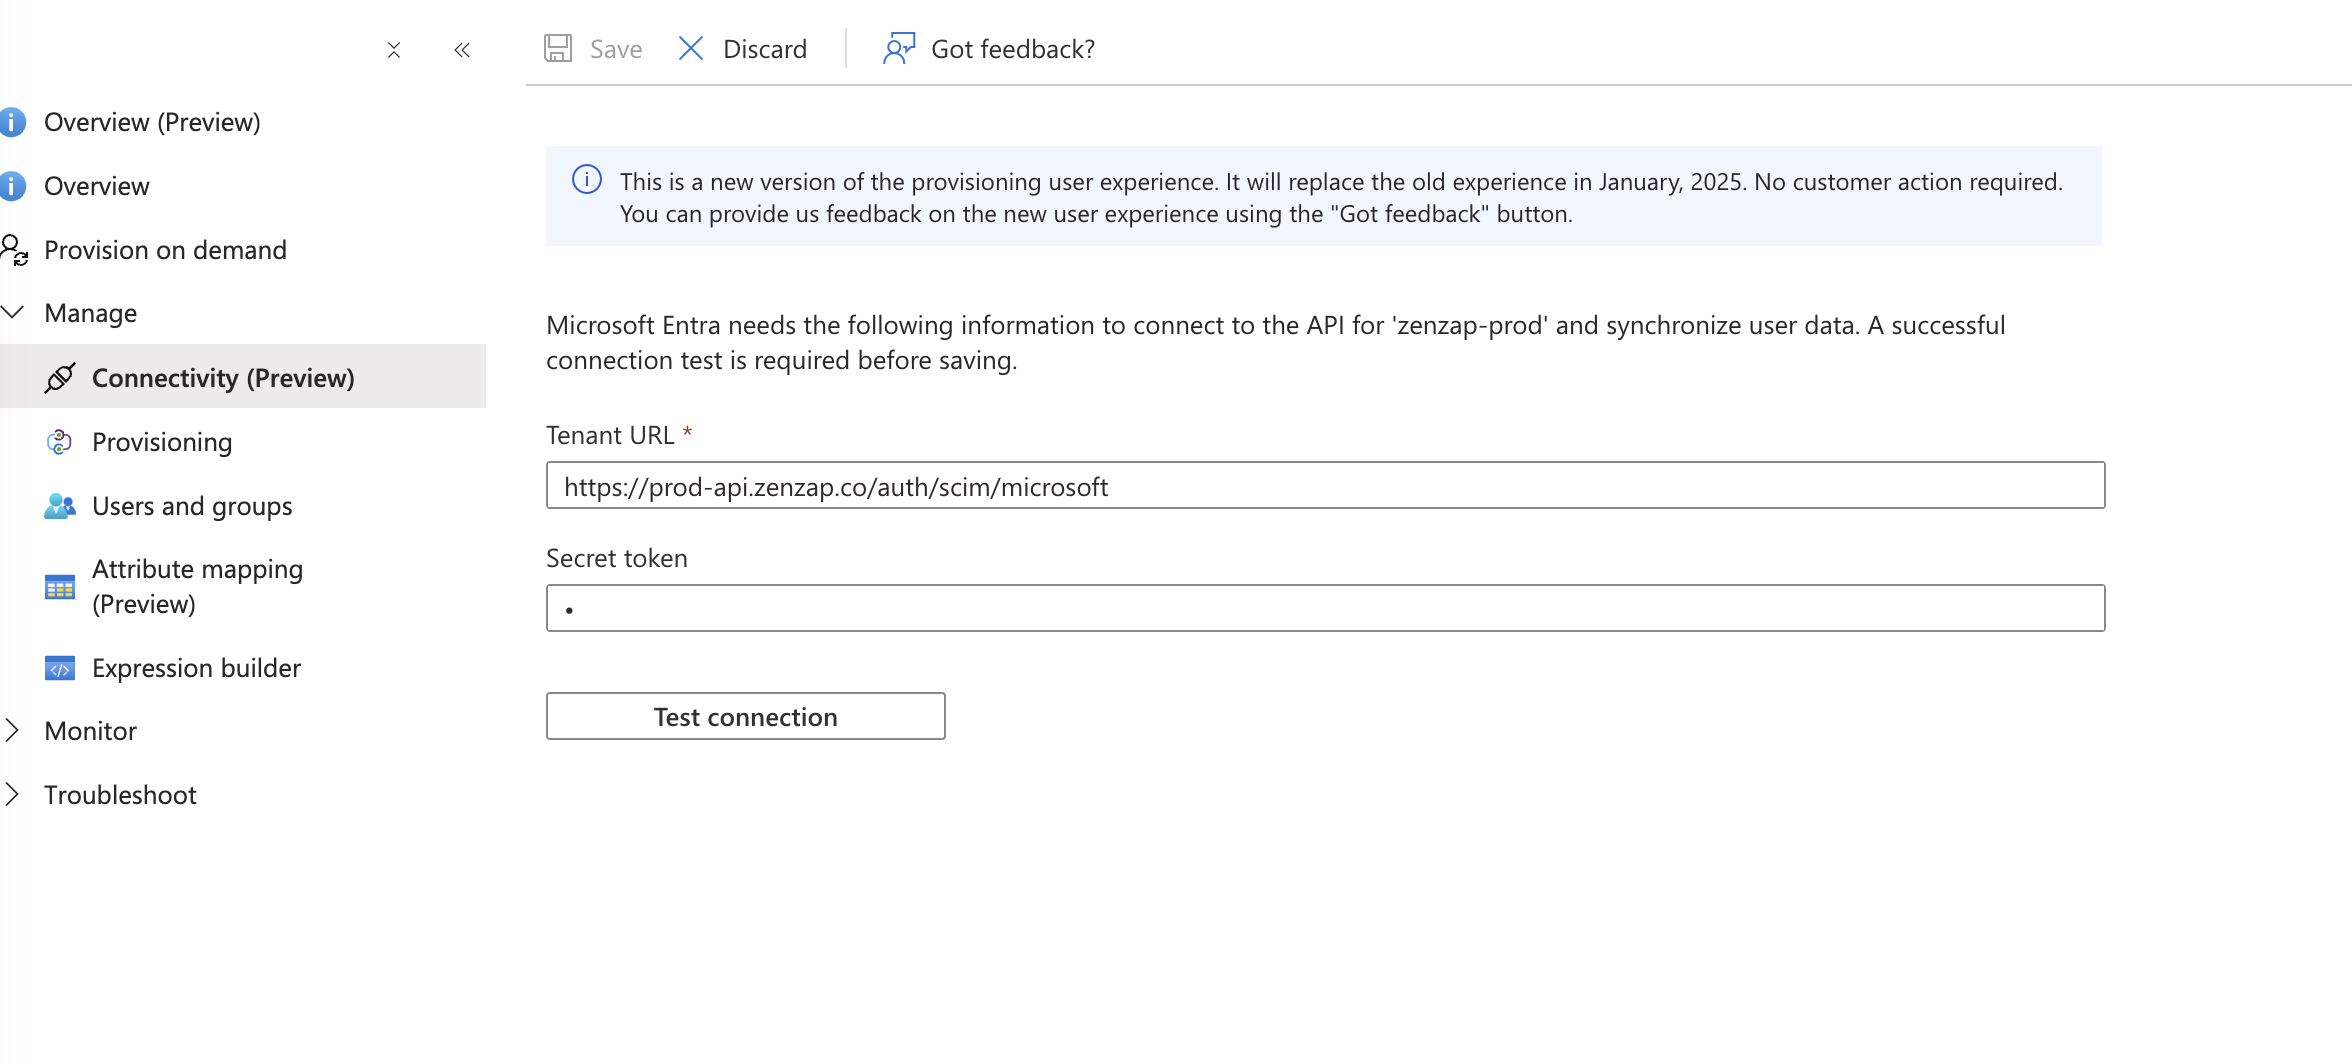
-
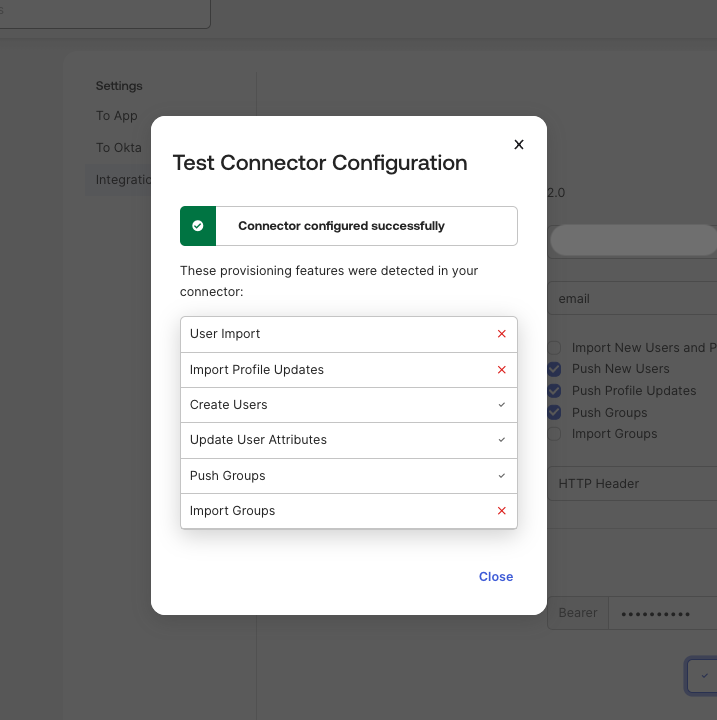
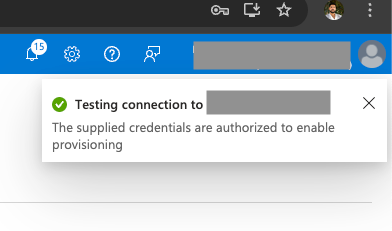
Test Connection and verify the connection is successful.
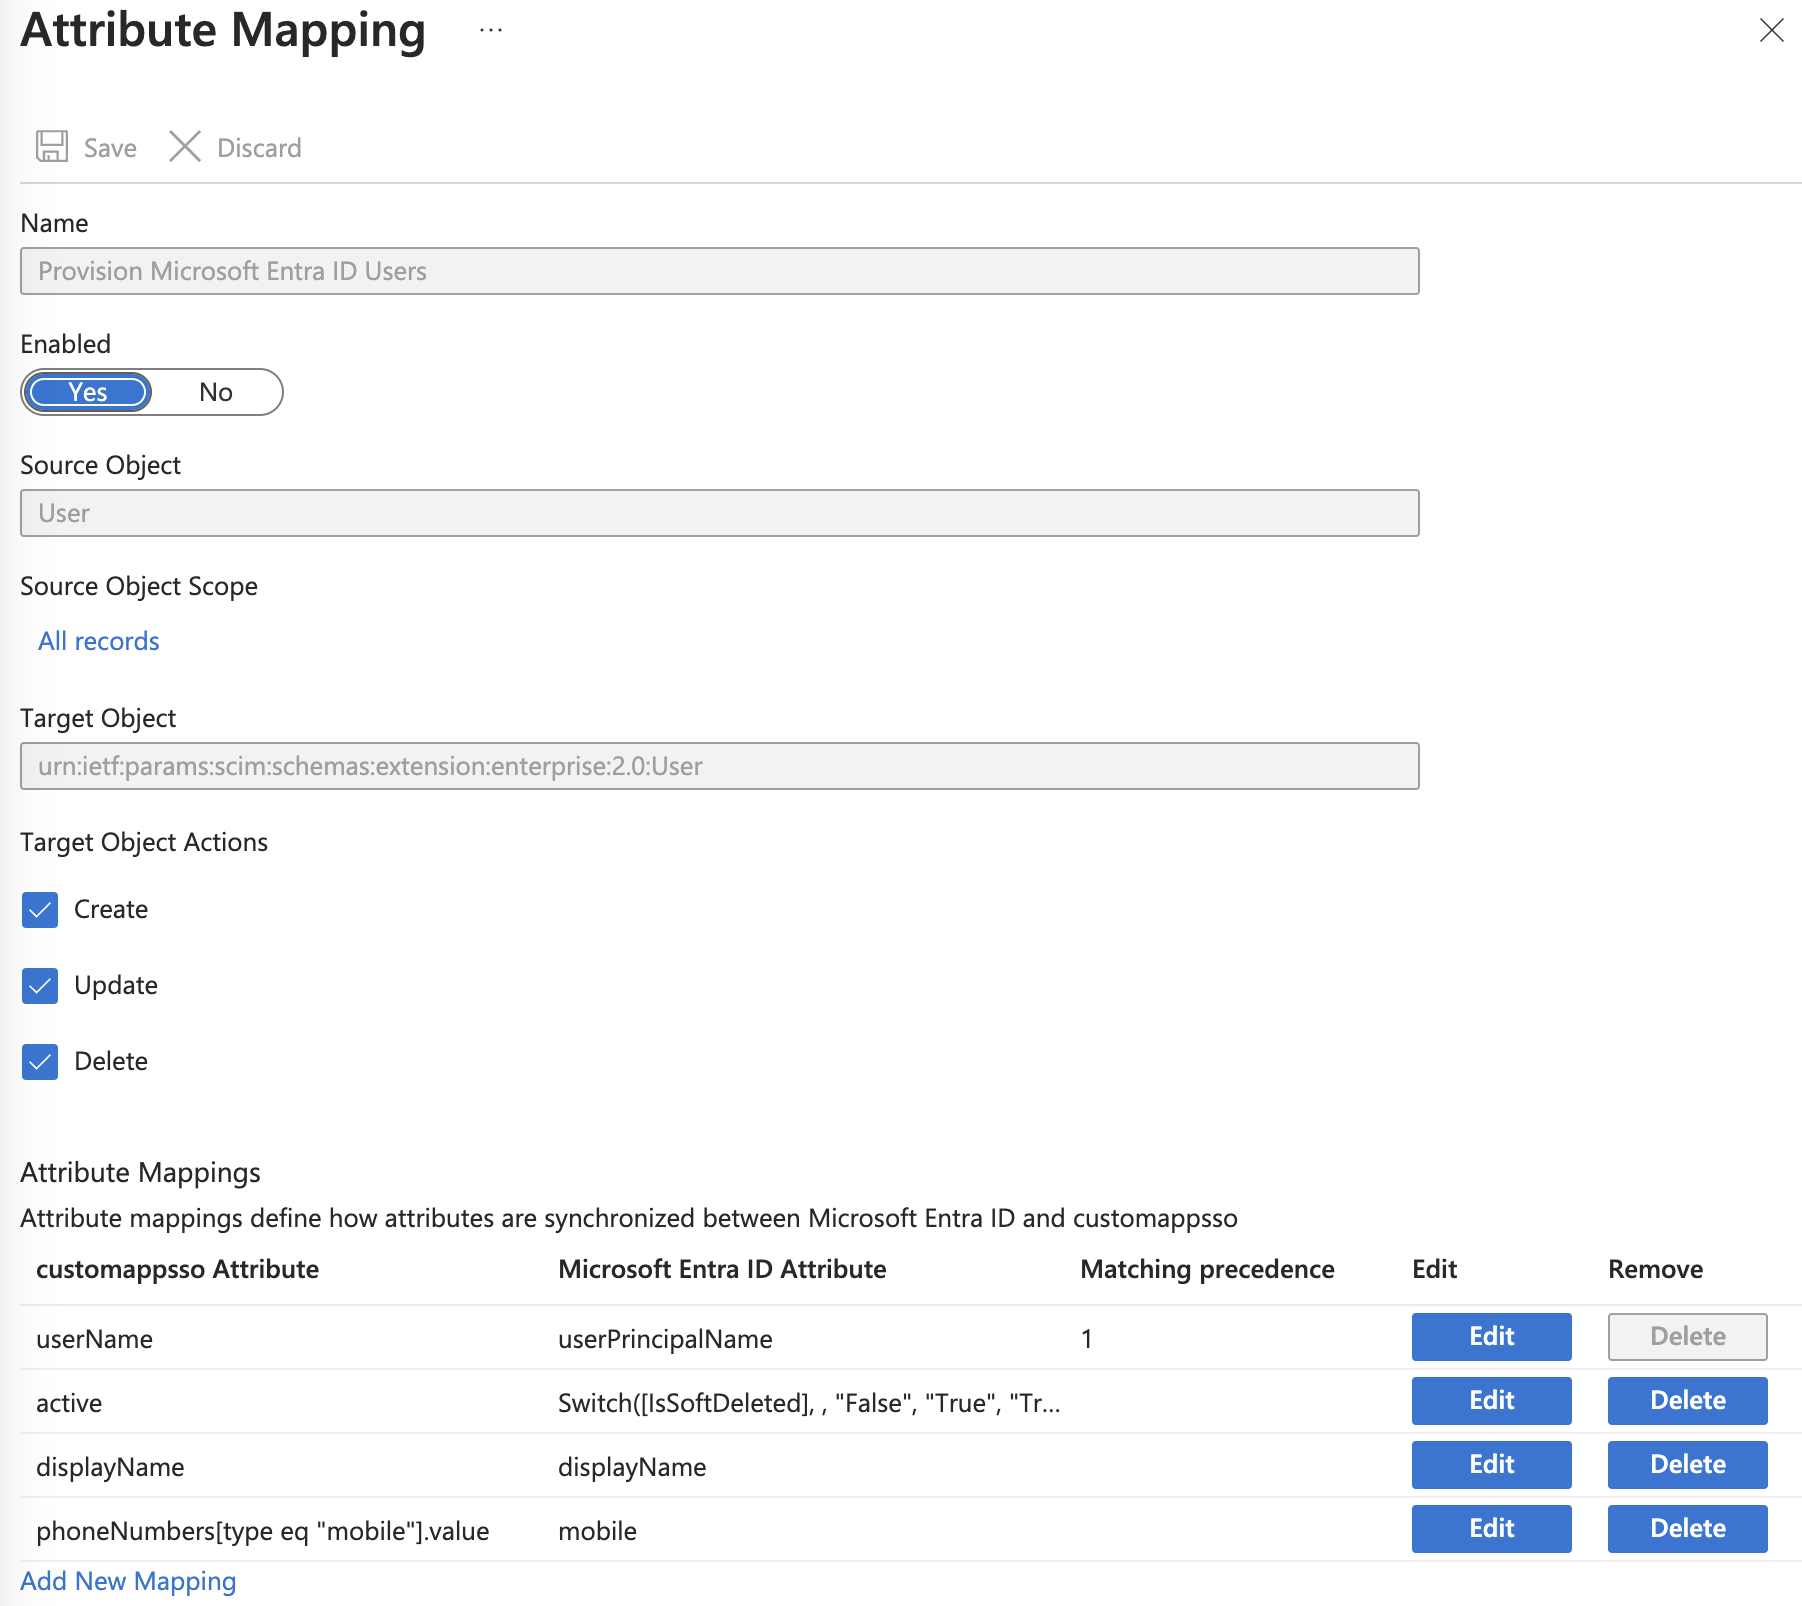
- Map the user attributes to the correct fields in Zenzap:
| customappsso Attribute | Microsoft Entra ID Attribute | Match objects using this attribute (edit button) | Apply this mapping (edit button) |
|---|---|---|---|
| userName | userPrincipalName | Yes | Always |
| active | Switch([IsSoftDeleted], , “False”, “True”, “True”, “False”) | No | Always |
| displayName | displayName | No | Only during object creation |
| phoneNumbers[type eq “mobile”].value | mobile | No | Only during object creation |
-
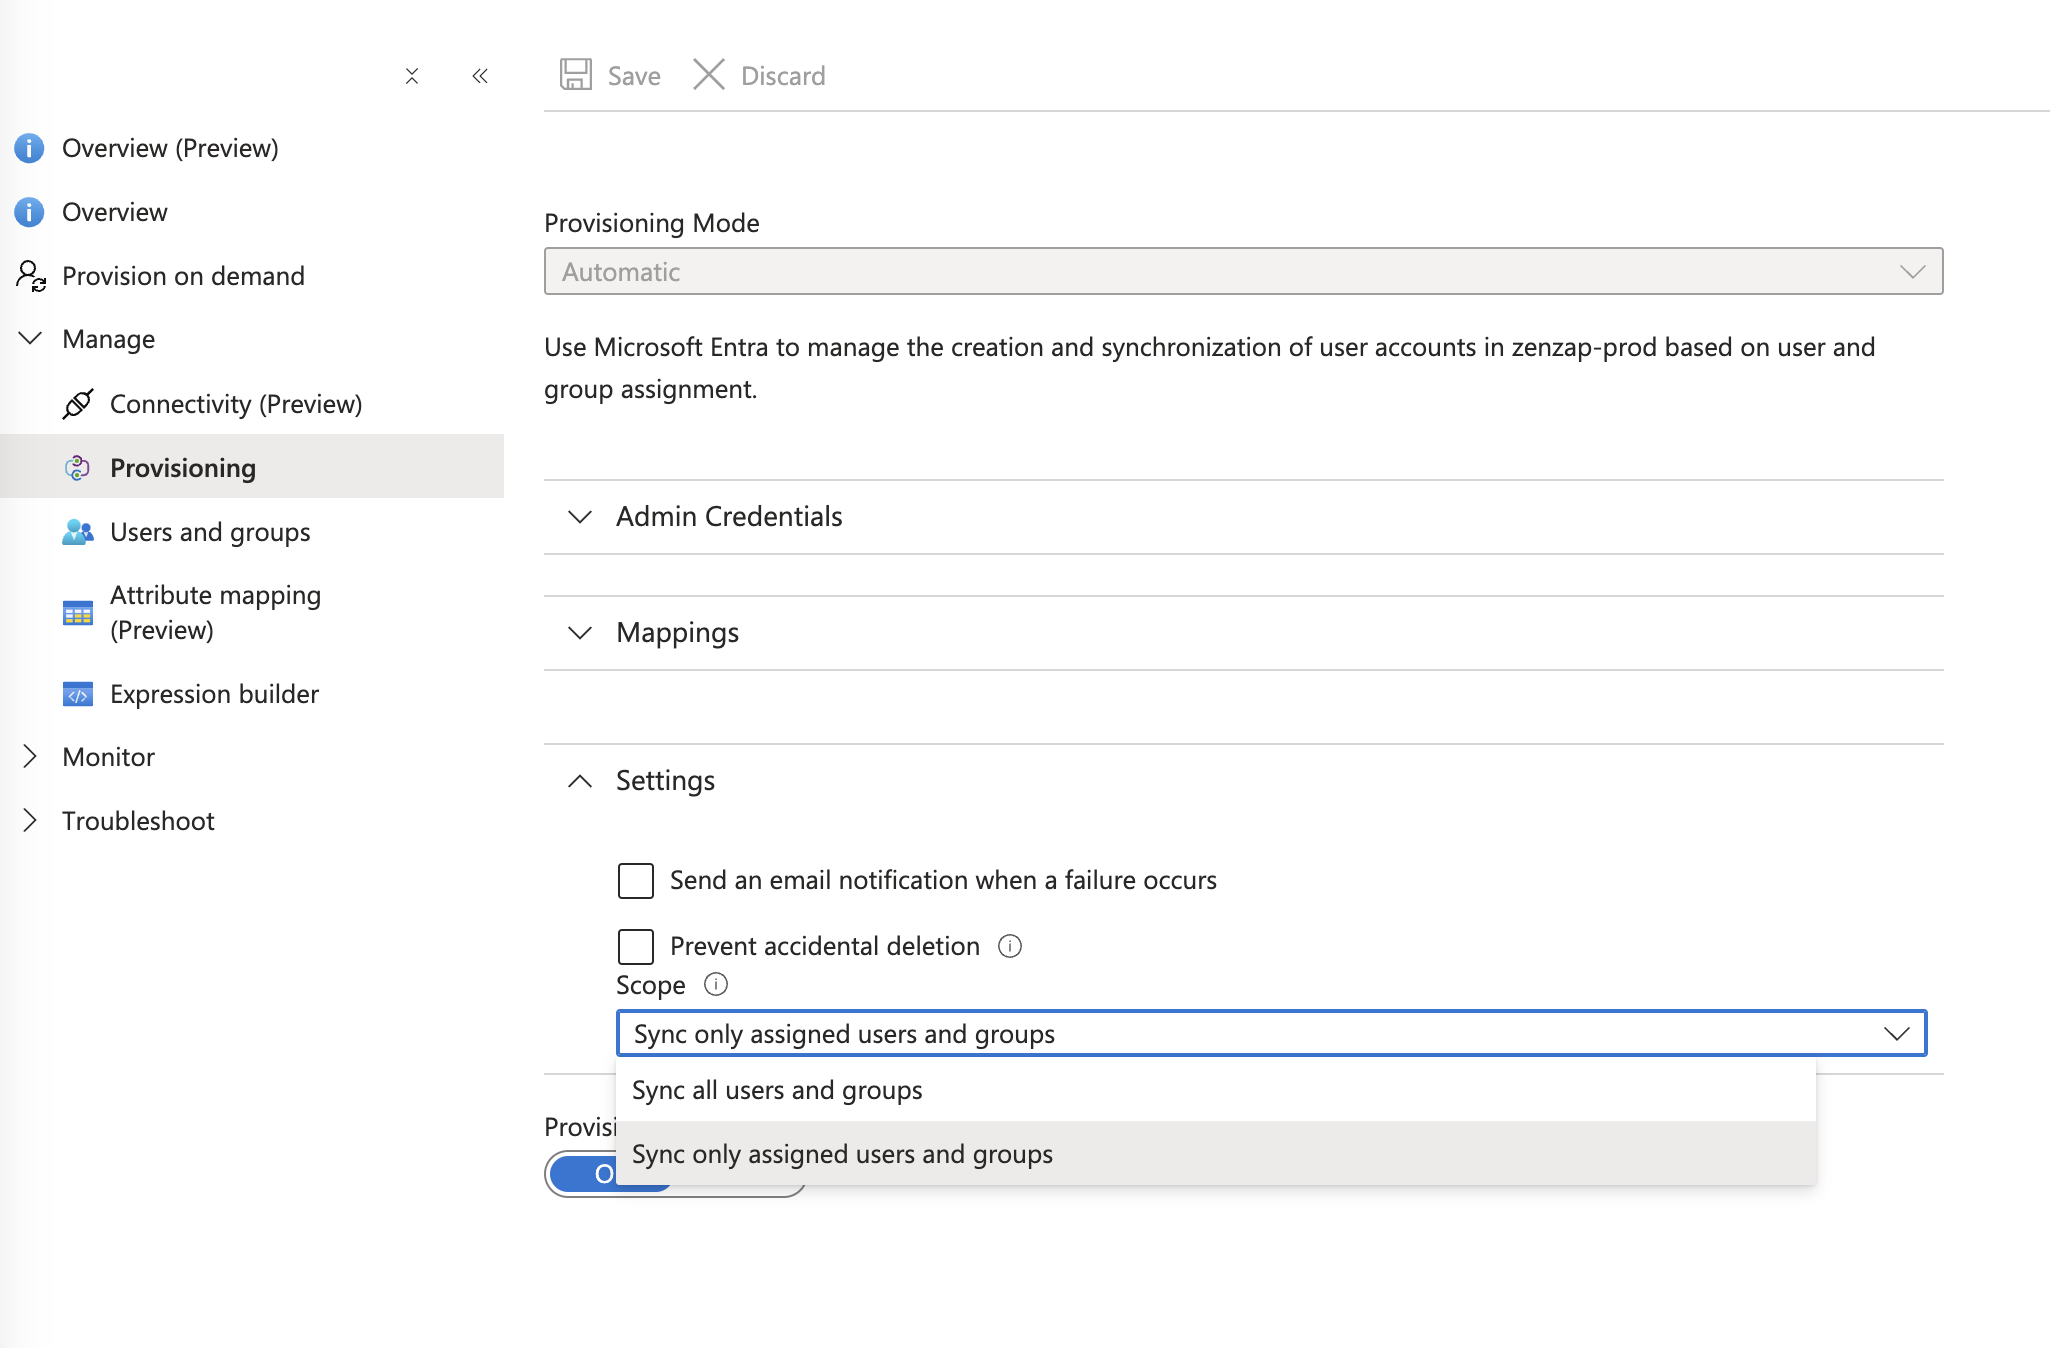
Set “Sync only assigned users and groups” and click Save
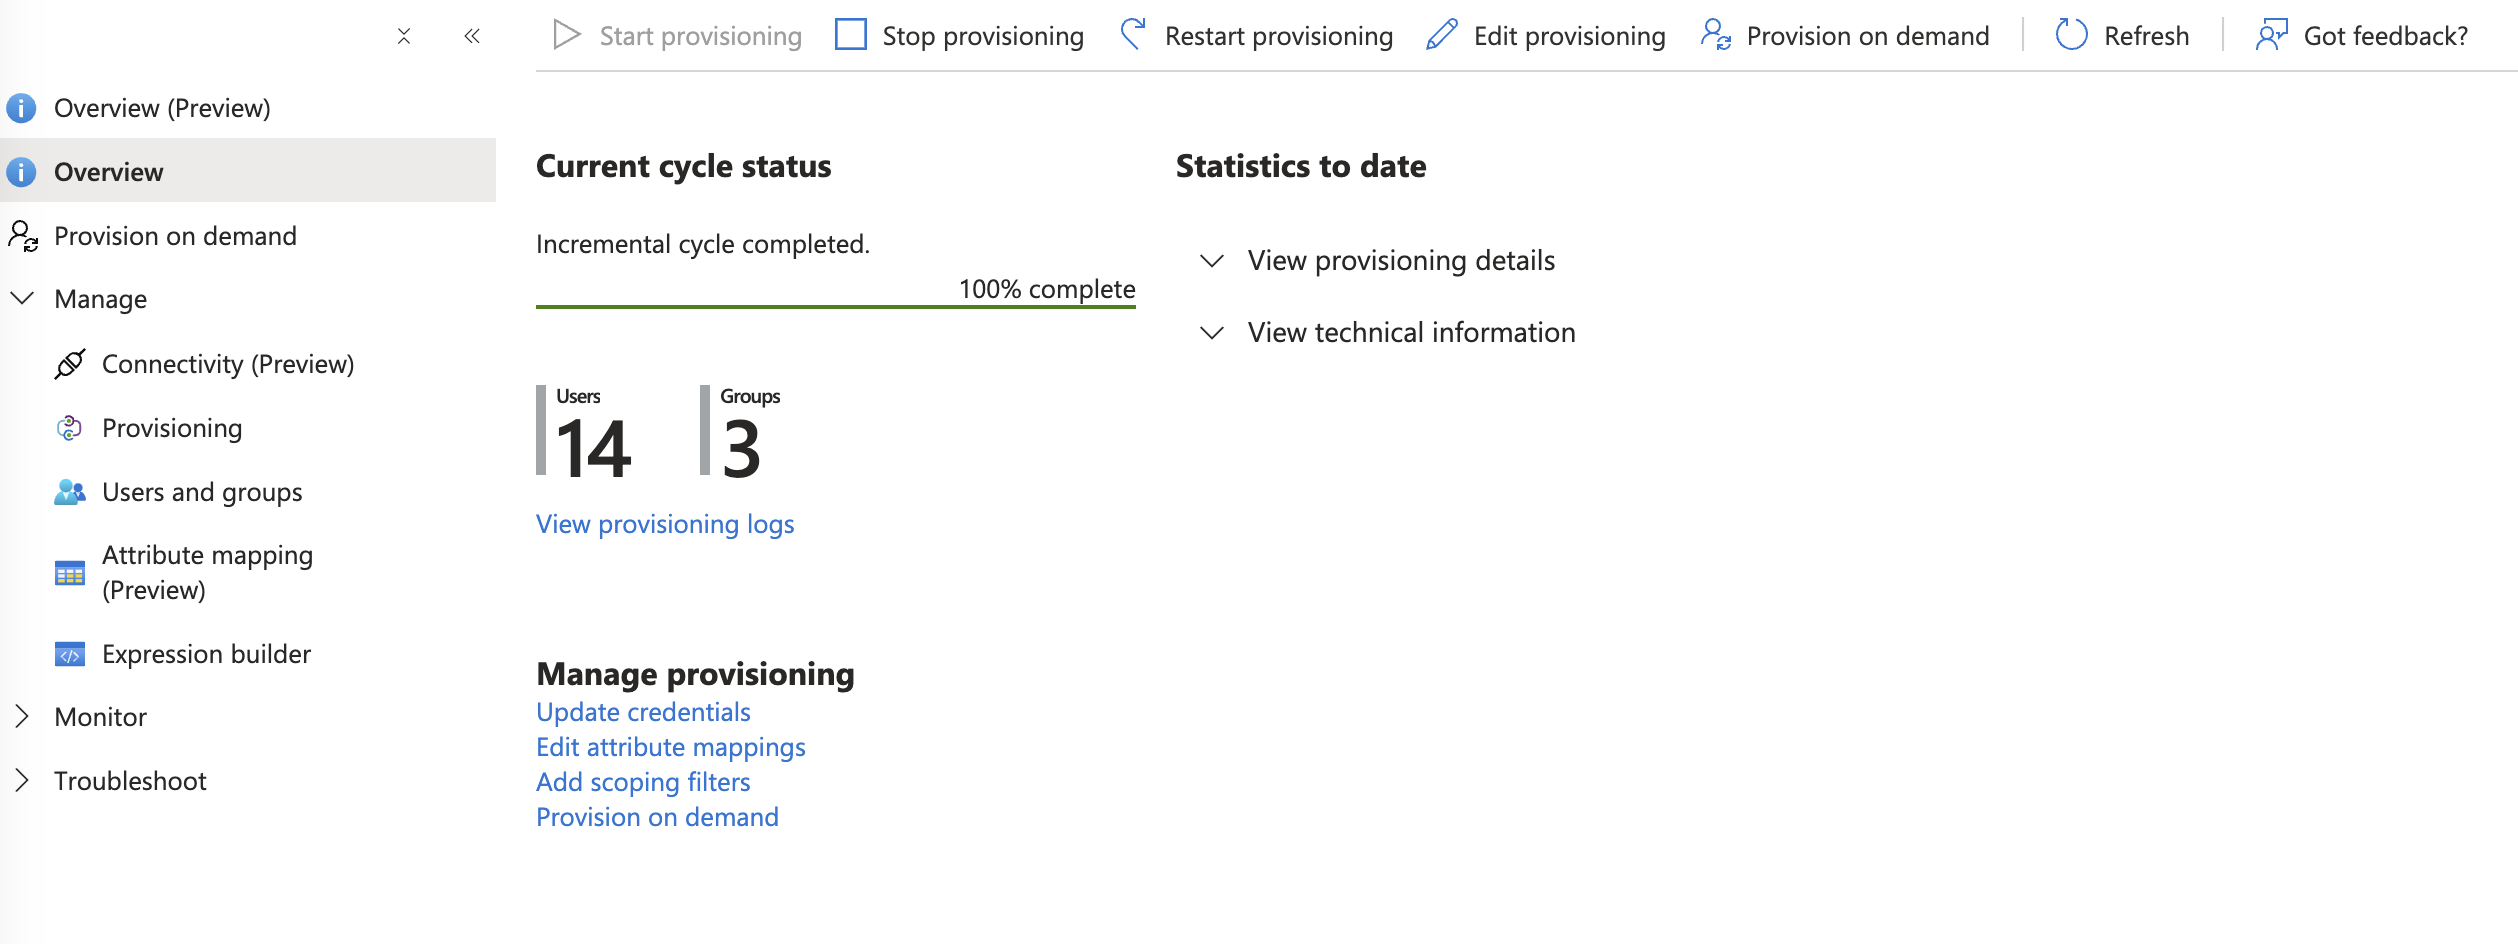
- Press start provisioning. This process typically takes up to 40 minutes.
-
Check the provision overview for any errors.
-
Users will appear in the Zenzap admin screen under the Organization section.